
Twitter Channel
Webex Engage's Twitter channel facilitates monitoring and responding to Twitter direct messages and public posts on the Twitter community. As a client admin, you can monitor tweets or receive direct messages from one or more Twitter accounts. All these messages are created as chats within Webex Engage. The messages exchanged (either in the form of tweets or direct messages) are saved as the conversation history within a chat.
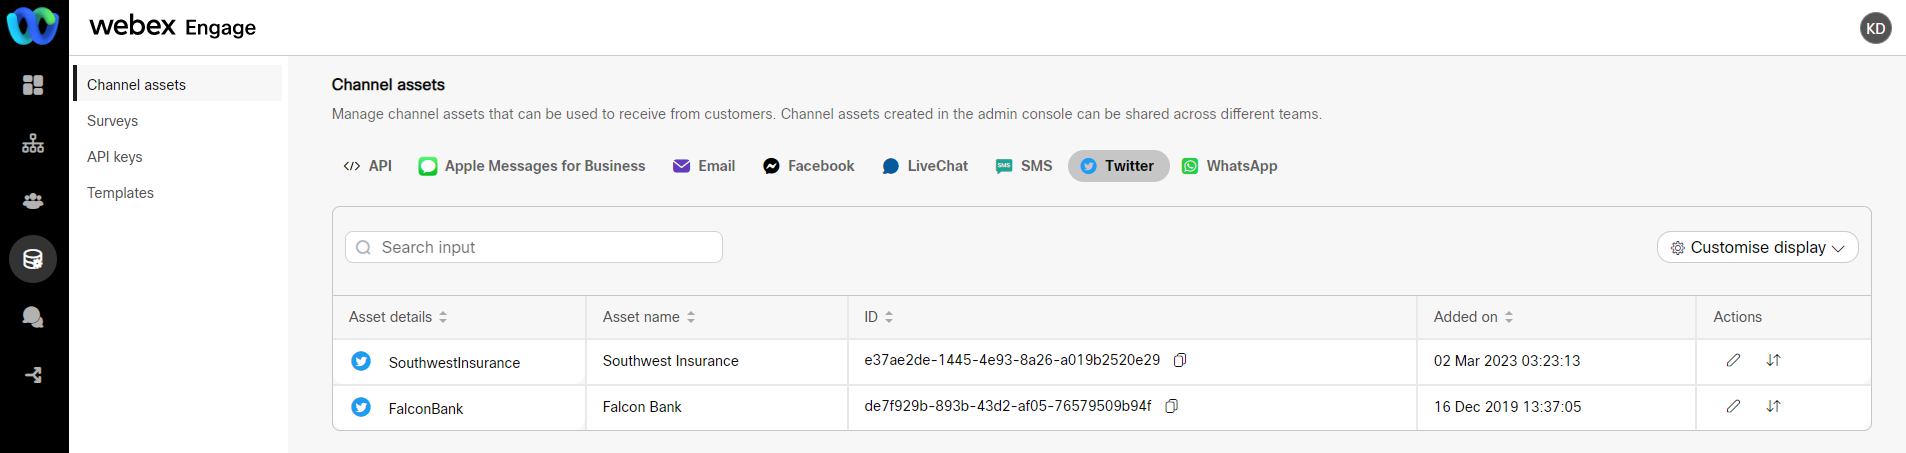
Currently, you can create Twitter assets only from the Webex Engage WebPMS application. But you can view the assets created on the WebPMS application on the React application under the Twitter Channel assets tab. Additionally, you can edit, search, and view customise the display of table results of the Twitter asset. Further, you can transfer conversations within or across teams and assign them to team queues, individual assignees, or skills, just like the behavior of the channels on the Webex Engage application.
Edit a Twitter asset
To edit a Twitter asset, follow these steps:
-
Login to Webex Engage.
-
Click the Try new version button on the top-right corner of the application.
The Webex Engage React application will launch. -
Navigate to Assets> Channel assets.
-
Click the Twitter channel tab.

- Click the Edit icon in the Actions column of a specific asset.
The following screen appears on the screen.
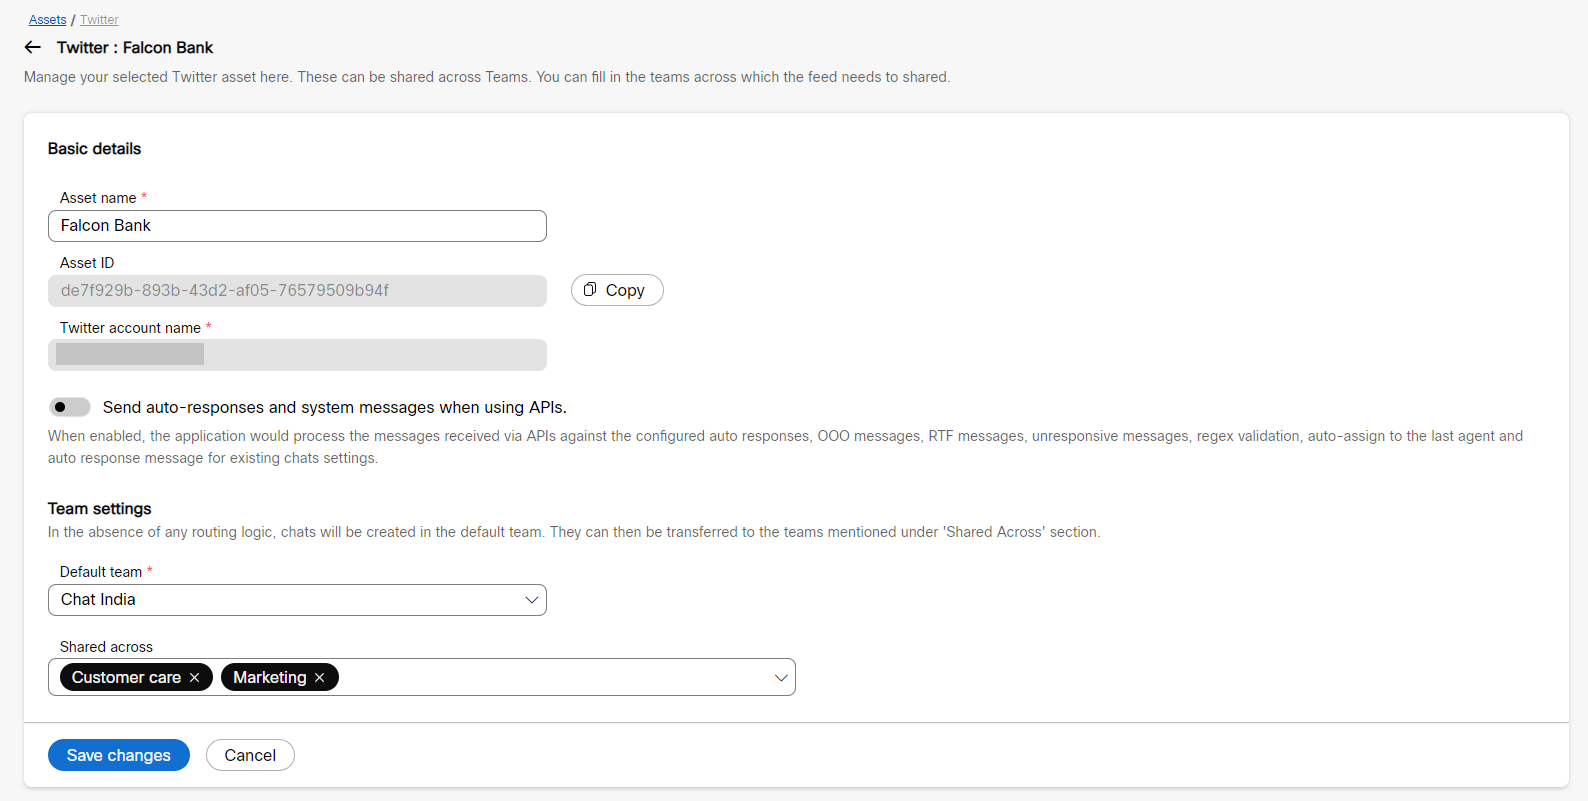
- Edit the required fields and click Save changes.
A success message appears on the screen.
Update priority
To update a Twitter asset's priority, follow these steps:
- Login to Webex Engage.
- Click the Try new version button on the top-right corner of the application.
The Webex Engage React application will launch. - Navigate to Assets> Channel assets.
- Click the Twitter channel tab.

- Click the Update priority icon in the Actions column of a specific asset.
The following pop-up window will appear on the screen.
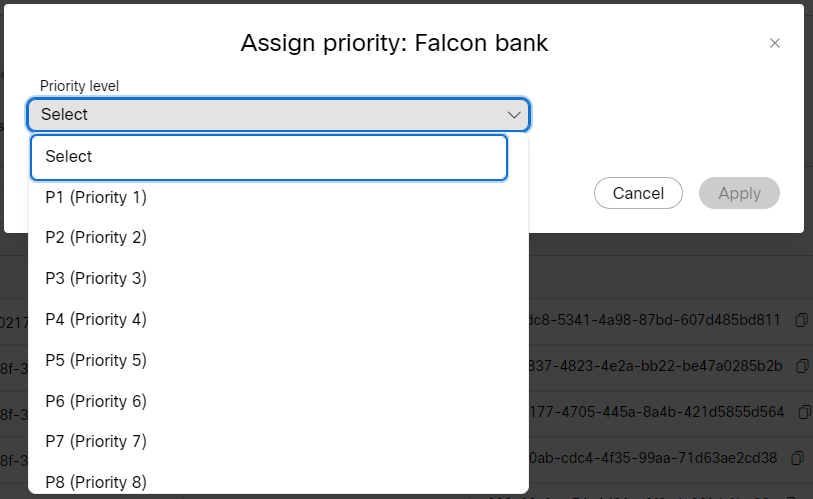
- Select a Priority from the Priority level drop-down and click Apply.
- If you select a priority other than P1, the Auto escalation rule(s) toggle appears.
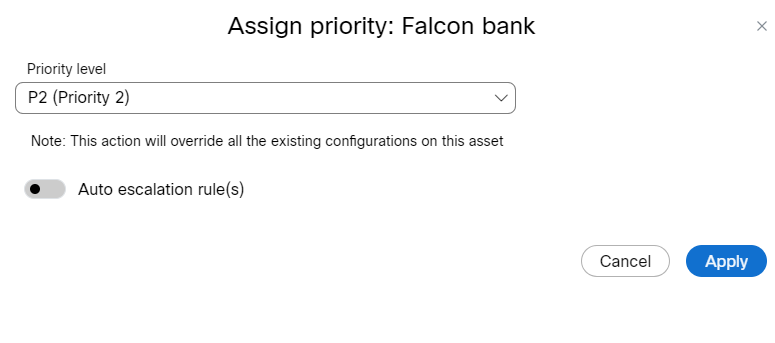
- If you turn ON the Auto escalation rules(s) toggle, the auto escalation configuration options will appear.
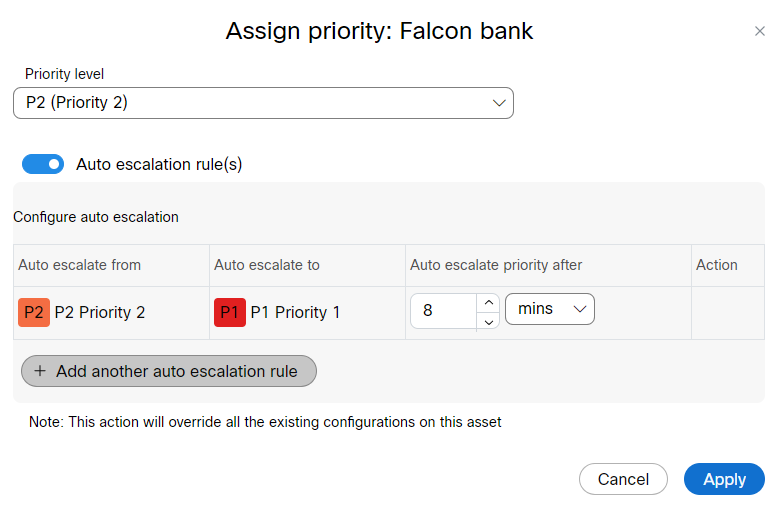
- Select the escalation time from the Auto escalate priority after drop-down in minutes and click Apply.
Note
- As per the chosen priority, you can add number of escalation rules.
Example: If you select priority as P2 then you can add one escalation rule. If you select priority as P3 then you can add two escalation rules, etc.- If you select priority as P1 then the Auto escalation toggle will be greyed, and you cannot select it.
Search Twitter asset
To search for a Twitter asset, follow these steps:
- Login to Webex Engage.
- Click the Try new version button on the top-right corner of the application.
The Webex Engage React application will launch. - Navigate to Assets> Channel assets.
- Click the Twitter channel tab.
- Enter the search criterion in the Search input field above the table results.

The respective results will appear on the screen.
Customise display of table
The Customise Display helps you select a specific list of columns you want to preview in the table results.
To view customise table results, follow these steps:
- Click the Customise display drop-down on the top-right corner of the results table.
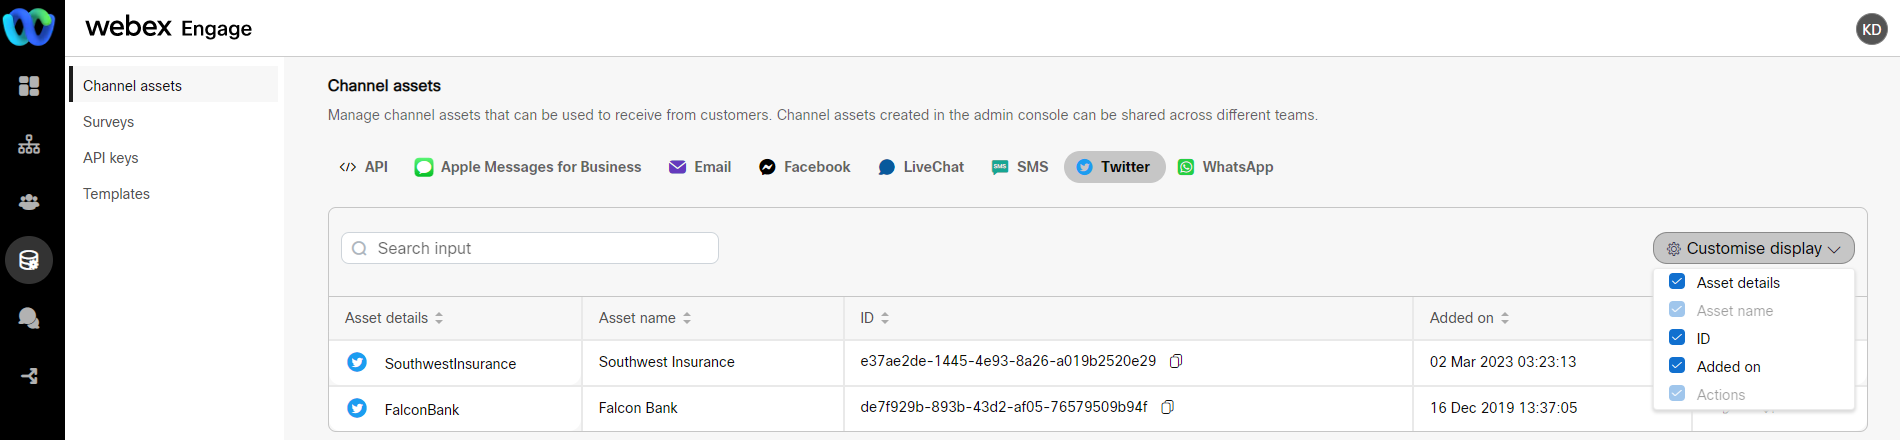
- Choose the required columns from the list by selecting the checkboxes adjacent to each column name.
You can instantly view the results on the screen by checking and unchecking the checkboxes.
Note
By default, Asset name and Actions columns are preselected and cannot be disabled.
Updated about 2 years ago