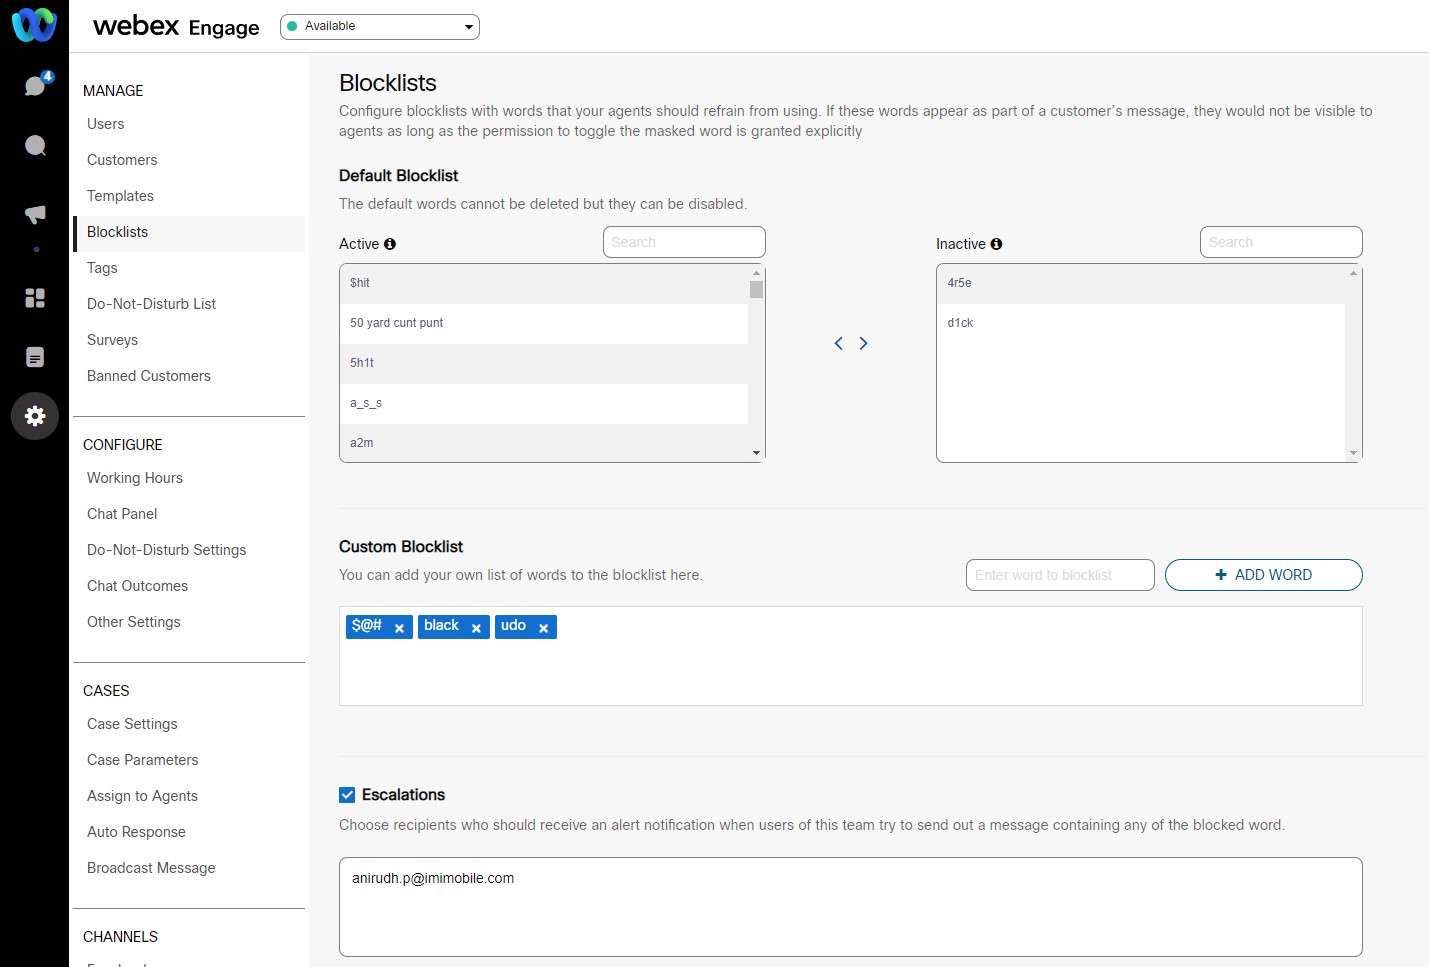
Blocklists
The Webex Engage application checks all the chat messages and filters the blocked words before sending them to the customers. The incoming messages are verified for these words and replaced with an asterisk (*) before sending it to the agents. Here, you can also provide the privilege of unmasking blocked words to the agents.
You can perform the following actions on the Blocklists screen:
- Configure the blocked words that must be filtered out of the messages or search for pre-configured blocked words.
- Configure the Email IDs of the recipients for whom a report will be sent if blocked words are found in the outbound messages that the agent tries to send to the customer.
If the message typed by the agent contains any of the blocked words, a warning is shown, and the message is not sent until that word is removed.
To navigate to blocklists, go to Agent Console > Settings > Manage > Blocklists.

The blocklists feature not only supports English language but also supports the full range of Unicode characters that covers a vast majority of languages in the world.
Default Blocklist
This section displays the default blocked words on the platform. These words cannot be deleted, but they can be activated and inactivated.
Inactivate Blocklist Words
To inactivate the blocklist words, follow these steps:
- Select the word from the existing Active list.
Note
You can select multiple words by using SHIFT key and inactivate them at once.
- Click the Right Arrow icon to move the blocked word to the Inactive list.
- Click Save Changes.
The success message appears on the screen.
Note
Admins (client admin/team admin/group admin) can only disable the blocked words. Admins do not have access permissions to delete the blocked words.
Activate Blocked Word
To activate the blocklist words, follow these steps:
- Select the word from the existing Inactive list.
Note
You can select multiple words by using SHIFT key and activate them at once.
- Click Left Arrow icon from the Inactive section. A confirmation window is displayed.
- Click OK to remove the word from the allow list words and activate the blocked word.
- Click Save Changes.
Custom Blocklist
This feature allows the agent to configure a list of blocked words.
Add Blocked Word
To add a blocked word, follow these steps:
- Enter the blocked word in the field beside Add Word button.
- Click Add Word. The word is displayed in the text box. Similarly, you can configure n number of words.
- Click Save Changes.
The success message appears on the screen.
Escalations
To enable escalations, follow these steps:
- Select the Escalations check box.
- Enter the Email IDs (separated by comma) in the given text box. All the configured user Email IDs will be notified on the occurrence of blocked words in outbound messages.
You can provide access permission to agents to unmask blocked words in inbound messages by selecting Allow the agent to unmask blocked words that appear in inbound messages checkbox.
3. Click Save Changes.
The success message appears on the screen.
Note
Please use the latest browser version to view the data on the Blocklists screen.
Updated almost 3 years ago
