Sent and Received Message Logs
This feature enables the team managers and analysts to Download the report on the Outgoing (MT) and Incoming (MO) logs during a specific period.
Download Report
To request for report generation,
- Click "Generate Report" in the "Sent and Received Message Logs" section of the page to display the calendar in the pop-up window.
- Select the Date Range from the given calendar and click "OK". A pop-up window will be displayed notifying that the request is queued for processing the report. Refer the image below.
- Click on the "View Requested Reports" to view the status of the requested report. The requested report will be initially in the "Pending" status. Refer the below image.
- Once the status changes to "Available", click on the "Download Icon" to download the report.
To Schedule a Report
- Click "Schedule Report" button on the Offline Reports screen.
The following pop-up window appears.
- Select the "File Format".
- It is recommended to select .xls option for reports on email channel as .csv files are likely to be malformed with email body content.
- Select the "Periodicity".
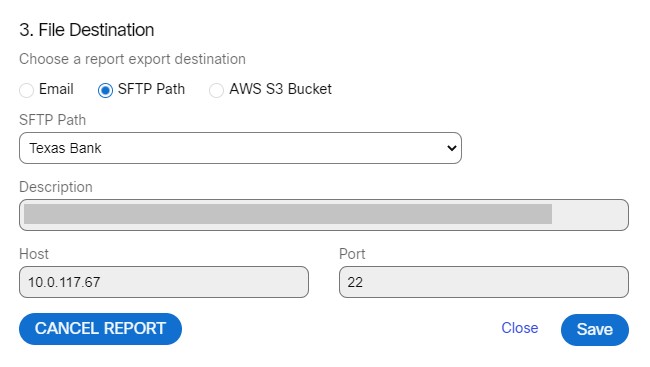
- Select the "File Destination".
- If you select "Email" radio button, a text box appears.
- Enter the email ids of the list of users to whom the report has to be sent.
- If you select "SFTP Path" radio button, the list of SFTP paths configured by the client admin under File Destinations screen (Client Admin Console > Settings > File Destinations) will appear.

- Select the "SFTP Path".
- If you select "AWS S3 Bucket" radio button, the list of AWS S3 Buckets configured by the client admin under File Destinations screen (Client Admin Console > Settings > File Destinations) will appear.
- Select the "AWS S3 Bucket".
- Click "Save".
A confirmation message appears on the screen.
To Cancel a Scheduled Report
- Click "Schedule Report" button in the respective report section. The Schedule Report pop-up window will be displayed.
- Click "Cancel Report".
The report will be cancelled, and a confirmation message appears on the screen.
Updated almost 3 years ago
