Queue
A queue is the team-specific chat list to which all the agents in a team have access. Any chat assigned to a team stays in the team’s queue until it is either manually picked up by an agent or assigned to an agent by a team manager. The team managers can also configure the chats to assign them directly to the agents instead of assigning them to the team’s queue.
Please visit [Case Settings]] for more information on this.

The Queue displays the chats that are currently active irrespective of the channels or the agents.
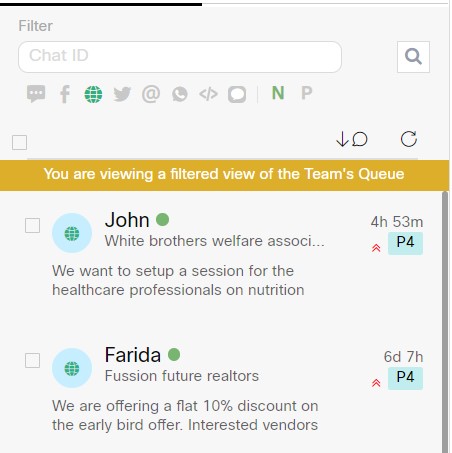
The screenshot below shows the statistics displayed for each chat in the Queue.
Agent can perform the following operation within a team’s queue:
- Search Chats
- Filter Chats
- Sort Chats
- Pick/ Transfer Chats
Search Chats
An agent can search for a chat within the queue only with Chat ID. A Customer Identifier (ID) here refers to a customer’s channel-specific Id such as Facebook ID/ Twitter ID/ Email ID / Mobile Number /WhatsApp Number /Apple ID / Livechat ID / Name.
To search chats
- Enter Chat ID in the search field of the queue module.
- The related chat is displayed based on the given search criteria.
When the chat is picked from the queue, the following pop-up is displayed:

Filter Chats
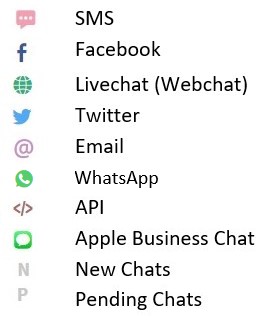
Agent can filter the chats within the team’s queue either based on channels or based on chat status (pending or new). The agent can use filters for only those channels that have been enabled for the team. Each channel is represented by their respective icons.

To apply the filter
An agent can disable all channel icons except for those he/she wants to view the chat results.
For example: To display chats on LiveChat, click the LiveChat icon. Deselect other channel icons, and these will be grayed out. See the screenshot below.

Accordingly, select different channels to display chats based on the selection.
You can also apply filters on chats status (New or Pending)
To View New Chats
Click the N icon to display the new chats on the console. The new chats are represented by a green dot adjacent to the Chat ID. You can view the color representation in the My Chats as well.

Pending Chats
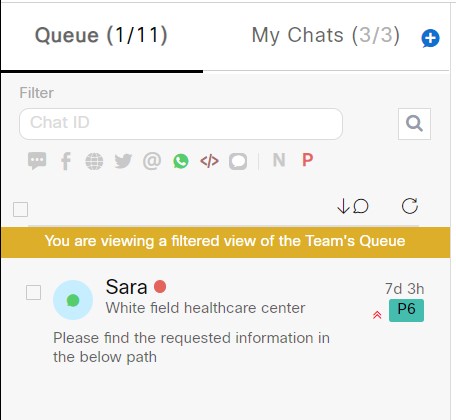
This feature enables the agents to view the pending chats in the queue. The pending chats are represented by a red dot adjacent to the Chat ID. You can view the color representation in the My Chats as well.
To view pending chats
Click the P icon to display the pending chats in the queue. See the screenshot below.

Note
The agent will not be able to deselect a channel filter if a chat from the same channel is active on the console. On trying to do so, a persistent toast message is displayed. Refer to the image below.

To deselect a channel, chat from the same channel should not be loaded on the Chat Console.
Sort Chats
Agents can sort the chats in the teams Queue based on three metrics: Latest Incoming Message or Longest Waiting Customer or Highest Priority. This enables the agents to prioritize between a new customer and a waiting customer. The sort order can be ascending as well as descending. An agent’s sorting order in the queue is saved automatically and the order persists across sessions (their logout and login actions) unless the agent changes it manually. This allows agent to set their order of preference and need not worry about setting it every time they login.
To Sort the Queue
- Click Sort icon within the queue to display a sub-menu. Refer the image below.
- Select Longest Waiting Customer to sort the queue on the basis of wait time of the customer i.e. the customer who messages first comes on the top of the queue.
or - Select Latest Incoming Message to sort the queue on the basis of the latest message sent by the customer, i.e. the customer who sent a message recently would come on the top of the queue (irrespective of which customer has been waiting longer).
or - Select Highest Priority to sort the queue on the basis of the highest chat priority, i.e. the higher priority chats would come on the top of the queue. In case multiple chats are with the same priority, the longest waiting customer sorting will be used to sort the chats with the same priority.
Pick/Transfer Chats
Agents can select single or multiple chats from the queue and can either pick (or load) those chats into ‘My Chats’ or transfer those chats to agents in the same team or to other teams sharing the same asset. The agents can also assign chats to other team’s queue.
To Pick/Transfer Chats select the check-boxes for the required chats in the Queue panel and click Pick or Transfer button respectively.
Transfer Chats
Follow these steps to transfer a chat:
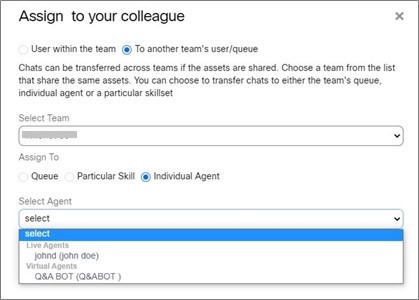
- Select the User within the team or To another team's user/queue option.
- If you select user within the team, the following options appears.
- Select Individual Agent or Particular Skill option.
- If you select individual agent, the Select Agent drop-down list appears.
- Select a Live Agent/Virtual Agent and click Assign.
- If you select particular skill, the Select Skill drop-down appears.
- Select a skill from drop-down list and click Assign.
A success message appears on the screen. - If you select transfer to another team's user/queue, the Select Team drop-down list appears.
- Select a Team or search it from the drop-down list. The following options appear on the screen.
- Select the Queue radio button to transfer the chat to the selected team's queue.
- If you select Particular Skill, the Select Skill drop-down list appears.
- Select a skill and click Assign.
A success message appears on the screen. - If you select an Individual Agent radio button, the Select Agent drop-down list appears.

- Select (Live Agent / Virtual Agent) from the drop-down list and click Assign.
A success message appears on the screen.
Pick Chats
Upon clicking Pick, the selected customer chats will be moved from the current state (Queue) to the My Chats section. The success message appears on the screen.
An agent can also pick a single chat by clicking on the chat in the queue.
The following confirmation message appears on the screen.

Click Yes, to move the chat to My Chats list.
Updated 12 months ago
