Case Parameters
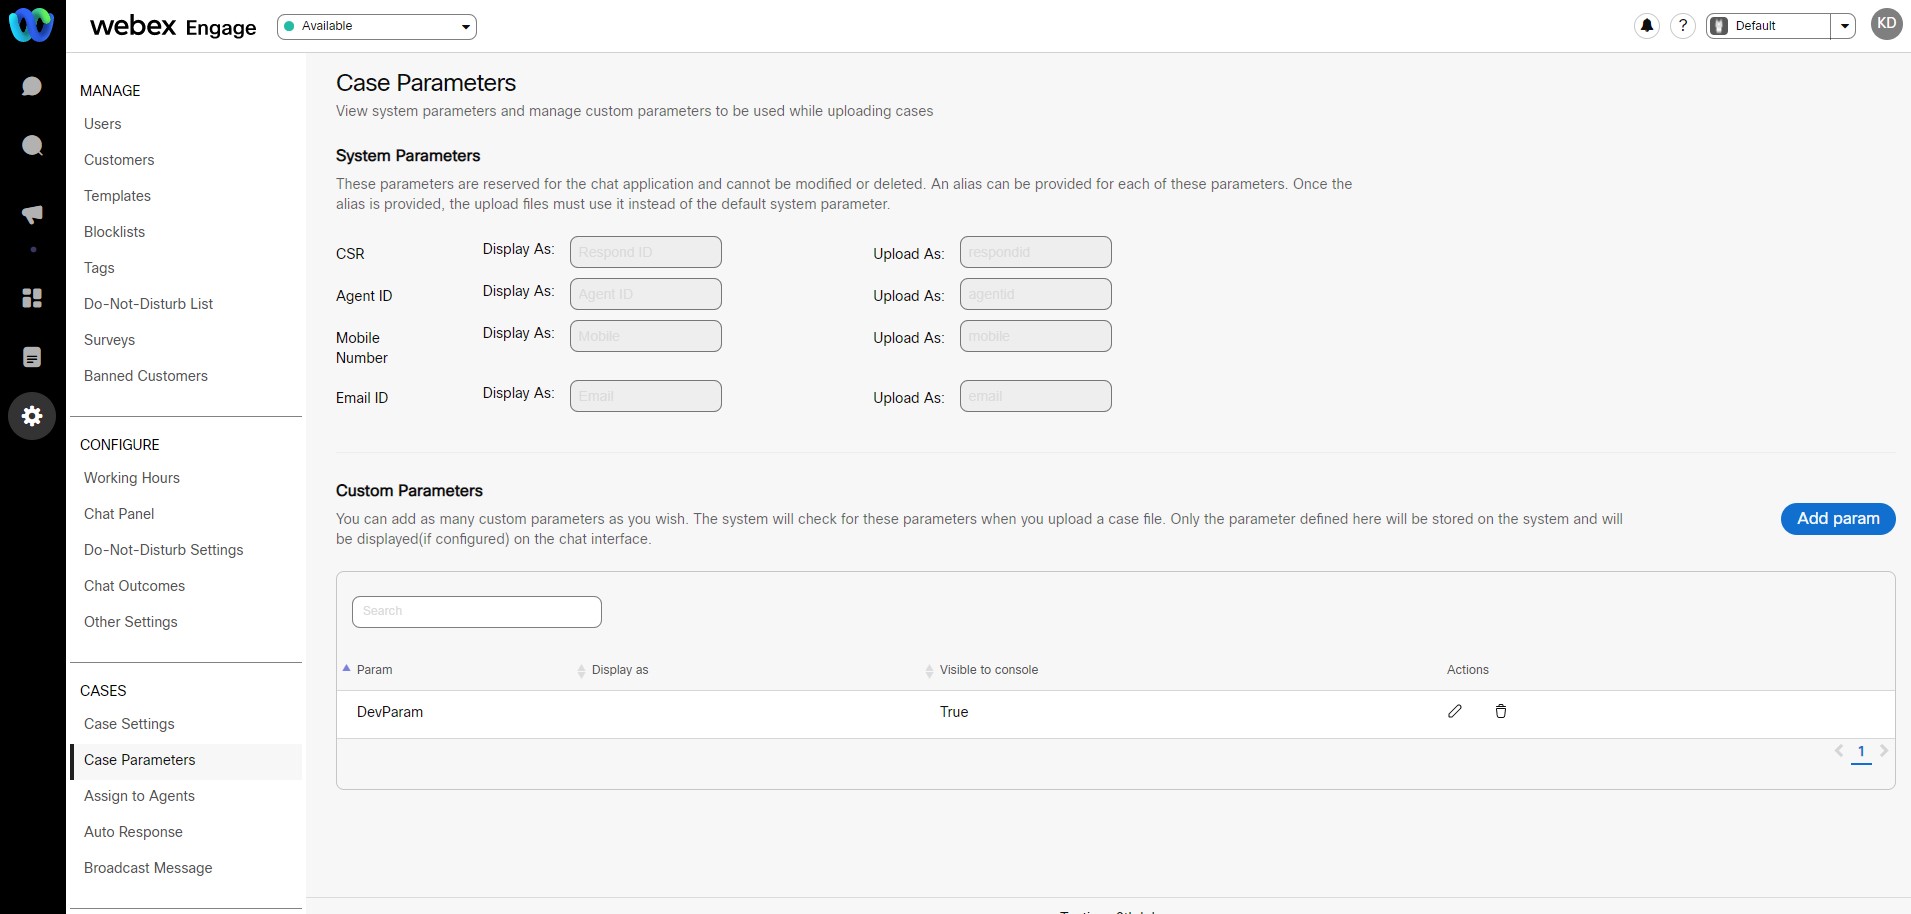
This feature enables you to configure alias names for system parameters and custom parameters that are used in the Webex Engage application while creating cases.
The parameters are used by the application while uploading cases (‘Assign to agents’ feature) or broadcasting bulk messages (‘Broadcast Messages’ feature). In addition, you can choose to add a few custom parameters (specific to the team) that could be used while creating a chat (by uploading cases).
To navigate to case parameters, go to Customer Care Console > Settings > Cases > Case Parameters.

On case parameters screen, you can configure the ,
- alias and display names for system parameters
- custom parameters
System Parameters
You can configure the display names and upload names for the system parameters reserved only for chat applications and cannot be modified or deleted.
Note
Once the alias names are configured, the uploaded case file must contain the alias names instead of the default system parameters.
To add system parameters,
- Enter the customized name (that need to be displayed on the chat console) in the Display As field, and click the green checkmark to save the parameter.

- Enter the customized name that needs to be specified in the uploaded cases file in the Upload As field.
- Click the green checkmark to save the parameter. The length of the parameter name can be maximum of 25 characters.
A confirmation message is displayed on the successful updating of system parameters.
Custom Parameters
You can configure any number of custom parameters on the case parameter settings. These parameters will be stored in the system, and will be displayed (if configured) on the chat console.
Note
Once configured, the system will check for these custom parameters in the case file while uploading.
To configure custom parameters, follow these steps:
- Go to Customer Care Console > Settings > Cases > Case Parameters.
- Click Add Parameters in the Custom Parameters section. The following pop-up window appears.
- Enter the *Parameter Name in the Parameters field.
- Toggle ON/OFF the Show this param in the info box on the chat console? to show the parameter details on the chat console..
- Enter the display name in the Display as field.
- Click Add.
The configured parameters are displayed in a tabular format in the Custom Parameters section. You can search for a specific parameter using the Search field, and also sort the parameters.
Edit Custom Parameter
To edit the custom parameter details,
- Click Edit icon corresponding to the parameter name in the Actions column.
The following pop-up window appears.
- Edit the required fields and click Update.
Note
The custom parameter name cannot be modified once configured.
Delete Custom Parameter
To delete a parameter , follow these steps:
- Click the Delete icon in the Actions column of a specific parameter.
A confirmation message appears. - Click OK.
The success message appears on the screen.
Note
The custom parameter, once deleted, cannot be configured with the same name.
Updated almost 3 years ago
