Single Sign-On (SSO)
Webex Engage supports single sign-on using SAML 2.0, wherein client admins can bypass the native authentication of Webex Engage and continue using an external identity provider such as Azure, Okta, Ping Identity, etc. This way, businesses can let their employees use their organization account credentials to log in to Webex Engage.
How SSO works?
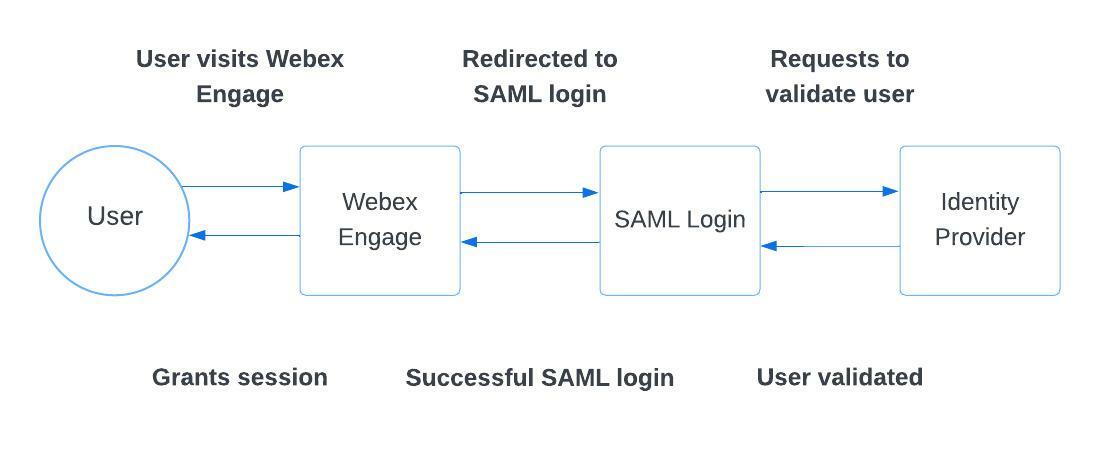
Webex Engage supports SSO using SAML 2.0. Below is a brief explanation of the user journey.

Even though user authentication is managed outside, the user must exist with Webex Engage with corresponding roles and privileges mapped.
When a user visits their tenant on Webex Engage that is SSO enabled, the user is redirected to the SAML Login Page configured by client admin under Settings > Single Sign-On along with a payload-carrying the authentication request. The identity provider validates the user based on the username/password entered and checks if the user has access to the Webex Engage application (in the identity provider).
Once the identity provider performs these checks, it posts back a SAML response containing a user identifier assertion: Email ID or Login ID to Webex Engage. Webex Engage then checks if the user has been validated successfully by the identity provider and grants a session.
Setting up SSO on Webex Engage
Login as client admin and go to settings > Single Sign On. The following screen appears.
Webex Engage requires the following information to set up SSO:
- SAML SSO URL: This is the 'Assertion Consumer Service URL' of the identity provider that is chosen to integrate with. Webex Engage would re-direct the users to this login when they try to log in using SSO.
- Entity ID: This is the identifier of the identity provider. SAML responses received from the identity provider will be verified against this entity ID configured.
- Remote Logout URL: This is an optional field. As the name suggests, when a user logs out from Webex Engage, a redirection is made to this Logout URL configured.
- Certificate Thumbprint: Webex Engage would also require a certificate thumbprint of the identity provider. The client admin can either choose to type the certificate thumbprint or upload a .cer/.cert file manually. Most certificates have an expiry date, so it is important to ensure that the certificate is active.
- Force SSO Login Alone: Toggle ON this setting to restrict users from using their Webex Engage credentials and use SSO alone. This way, Webex Engage would redirect users to the SSO SAML URL when they visit the Webex Engage instance (.imi.chat).
- Enable Encryption: Toggle ON this setting to upload your SSO (private) certificate and encrypt it.
- When this setting is enabled, the following options appear.
- Click Upload Certificate button and import the certificate in .pfx format.
Note:
You can upload certificate in only .pfx format and this file should contain public key file (SSL certificate) and associated private key file.
- Enter the Certificate Password and click the Validate button.
- If the validation is successful, you can view the preview of the metafile on the SSO page.
- If the validation fails, the system throws an error message to enter a valid certificate password.
- Click Save Changes to save SSO settings.
Setting up an Identity Provider
It is required to set up Webex Engage as an application on the identity provider.
While Webex Engage supports any identity provider that supports SAML 2.0, the following steps showcase the procedure to integrate with Azure Active Directory.
Note
Configuring most of the other identity providers should be similar.
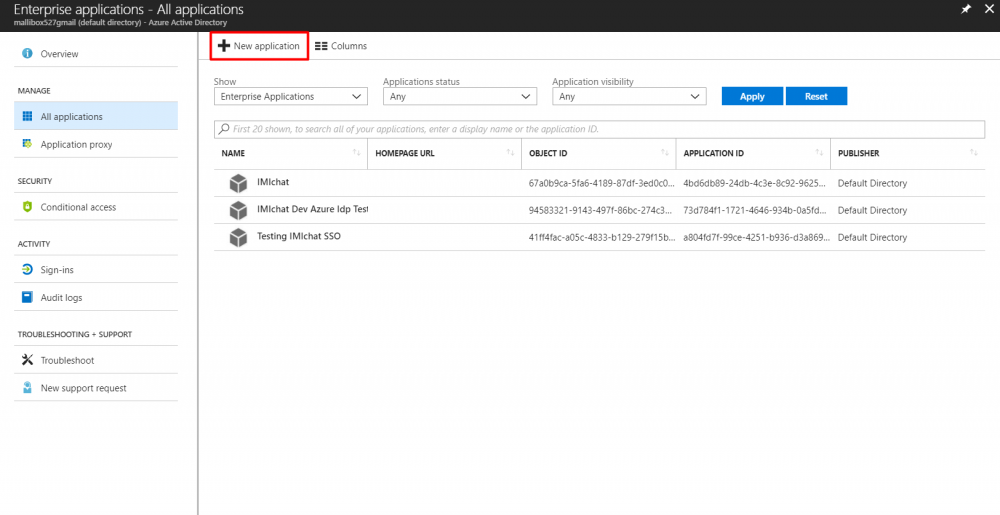
- Click New Application button to add an application.

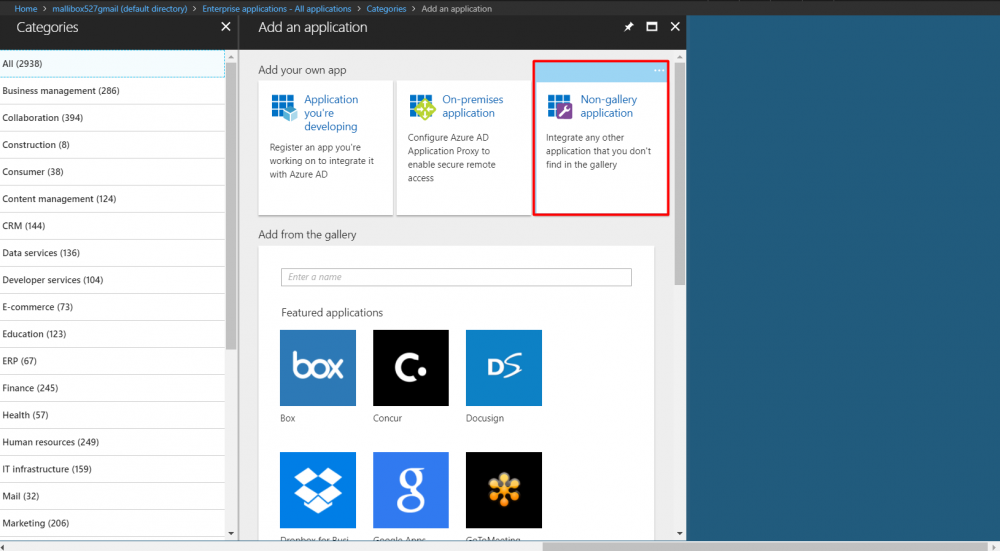
- Choose the Non-gallery Application option.

- Enter Application Name and click Add button.
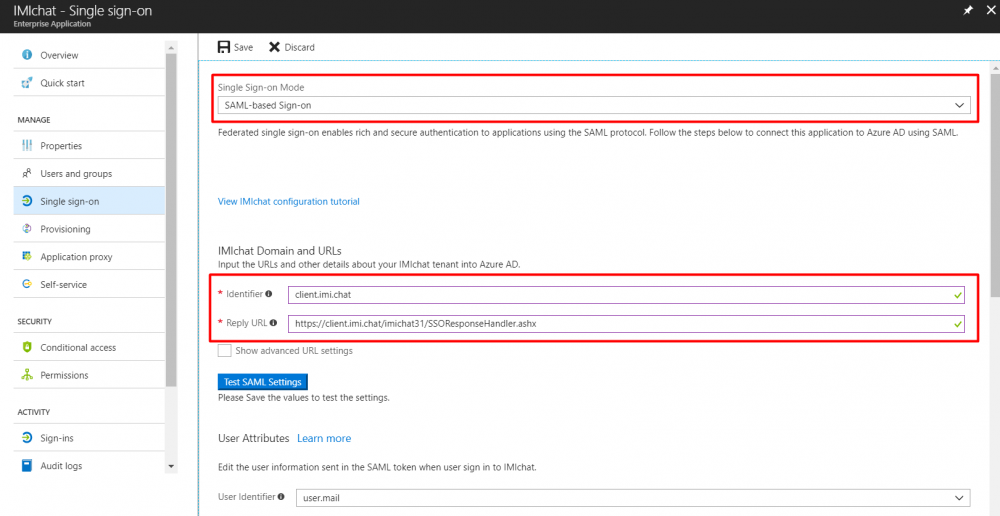
- In the single sign-on section, choose SAML based Single Sign-On.

- You can get the Webex Engage's Identifier (also referred to as Entity ID) and Reply URL (also referred to as Assertion Consumer Service URL (ACS URL)) from the Single Sign-On page in the Admin Console.
- Webex Engage requires login id as a SAML assertion. This field can hold either Login ID or Email ID (as configured in Webex Engage) as the value (Name space needs to be left blank).
Note
If the Identity provider allows to encrypt responses and sign them, choose the same to configure. Webex Engagesupports signed/unsigned and encrypted/unencrypted responses. The application also supports RSA – SHA1, RSA-SHA256 algorithms for Signatures and AES128-CBC, AES256-CBC algorithms for encryption.
Webex Engage's signature certificate can be obtained from the downloadable XML metadata from the single sign-on configuration page in the Admin Console.
In case of any queries, write to our operations team on [email protected].
Updated almost 3 years ago
