
Templates
The administrative users (client admins and group admins) can create templates on the React track. Agents can then utilize these templates as canned responses during customer conversations. This can significantly improve efficiency and consistency in your customer support interactions.
The templates screen is categorized into two tabs:
- Templates
- Categories
Templates
As an administrative user, you can create, edit, and delete templates on all channels we support on the React application. You can easily access the Templates tab to manage these templates. You can also create multiple Text templates at once by using the Upload Templates feature on the Templates screen. This allows for efficient and streamlined template management.
Add template
Follow these steps to add a template:
- Login to Webex Engage.
- Click the Try new version button on the top-right corner of the application.
The Webex Engage React application will launch.
- Navigate to Assets> Templates.

- Click the Templates tab. The following screen appears.
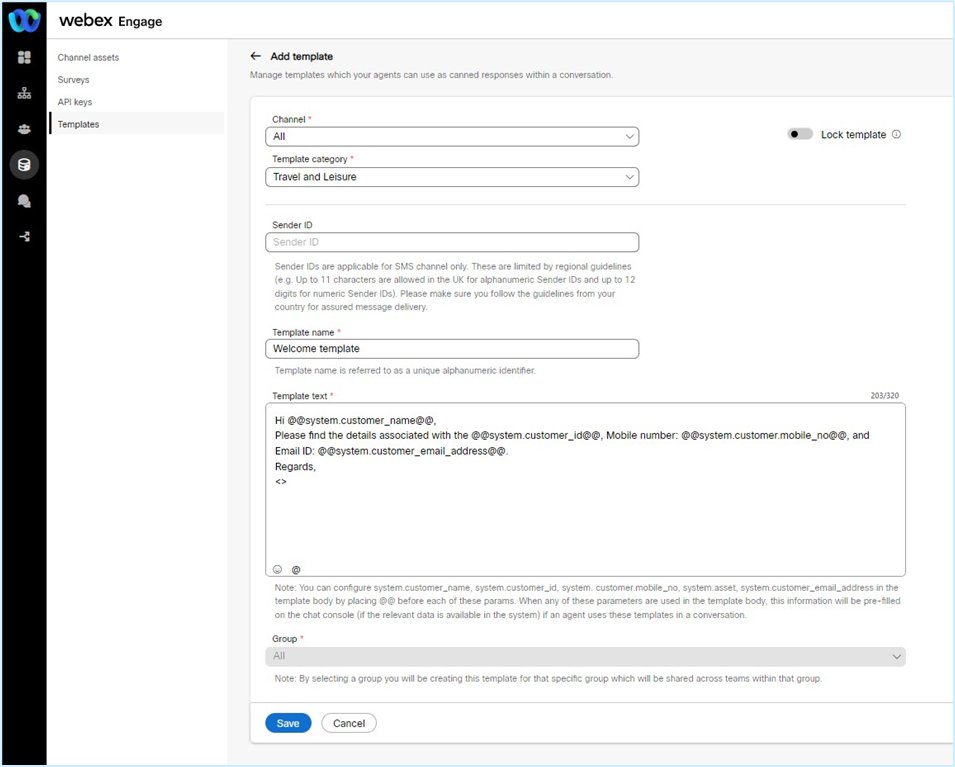
- Select a channel from the Channel drop-down list.
Note
When choosing a channel, you have the option to either select all or a specific one. If you decide to select all, a text template will be created on every channel that is supported by the React application.
- Select a category from the Template category drop-down to group the template under a specific category.
- Turn ON the Lock template toggle to Lock a template.
Note
When a template is locked, only custom/dynamic fields can be edited by the agents. A lock icon is displayed corresponding to the template.
- If you select All or SMS channel, the Sender ID field appears. Enter the Sender ID to deliver the message as per the country standards.
- Enter the Template name.
- Custom Fields: Enter custom/editable fields in the template body using chevron(<>) brackets. Custom fields are editable fields even in locked templates.
- System Parameters: Select the @ icon on the Template text to view the list of system parameters. You can select any of these parameters and compose the template text. When you include any of these parameters in the template text, the dynamic substitution of values occurs when an agent uses these templates in a conversation.
- Enter the Template text as per the character count supported on each channel.
Note:
The following matrix outlines the character count for each channel template supported on the React application:
S.no Channel Character Count 1 All 320 2 SMS 800 3 25000 4 2000 5 10000 6 Livechat 1000 7 4096 8 API 8000
- You can add Emojis to the Template text by clicking the Emoji icon on the Template text field.
Note:
When you create a template for a specific group that template is shared across all the teams under that specific group.
- Click Save. A success message appears on the screen, and the template is listed on the Templates tab.
Edit Template
To edit a template, follow these steps:
- Click the Edit icon in the Actions column of a specific template.
The following screen appears.
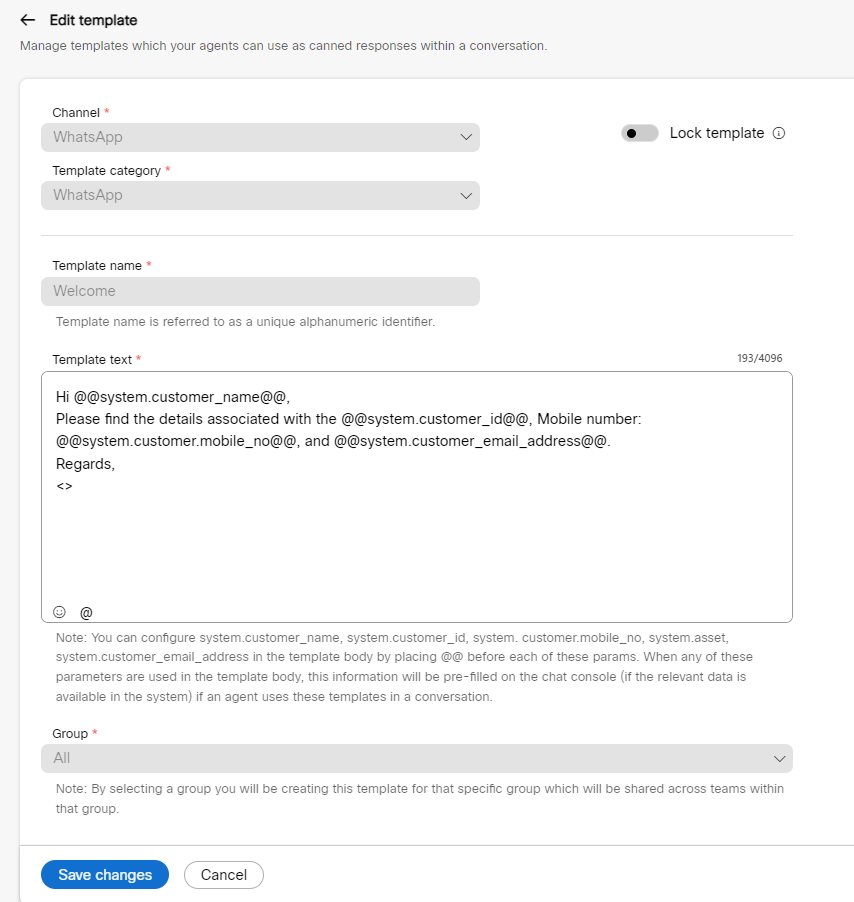
- Make the required changes to the template, and click Save changes.
Clone Template
To clone a template, follow these steps:
- Click the Clone icon in the Actions column of a specific template.

A copy of a template will open in a new window.
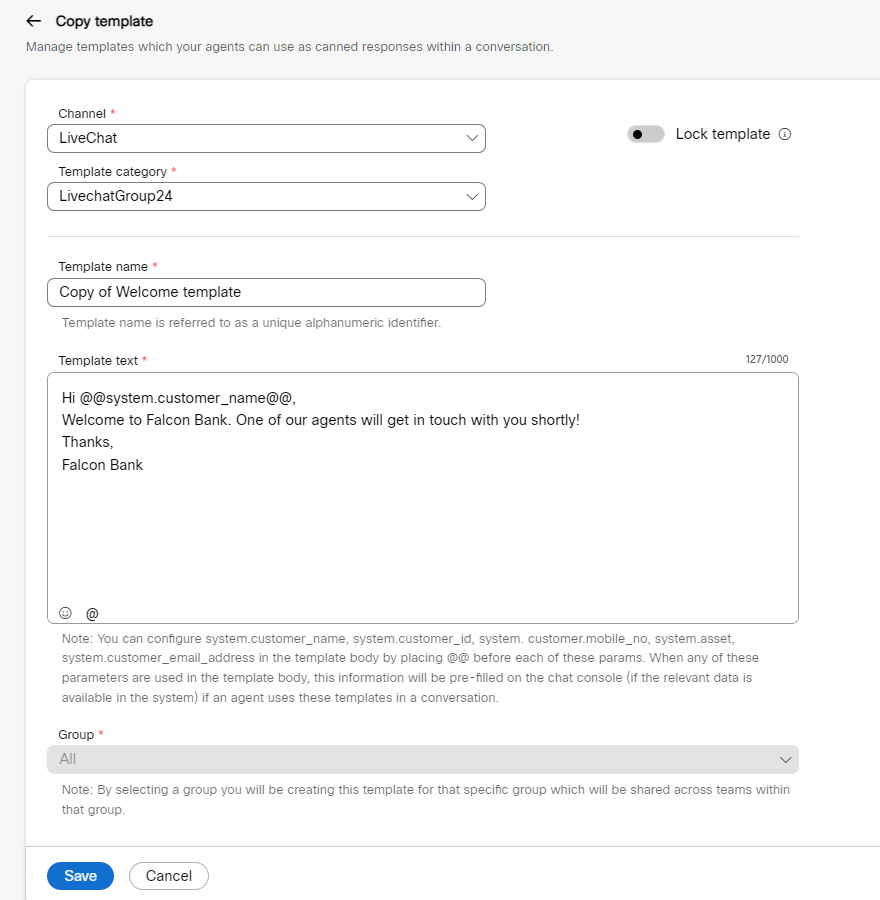
- Edit the required fields and click Save.
The success message appears on the screen, and the new template will be listed in the Template results table.
Delete template
To delete a template, follow these steps:
- Click the Delete icon in the Actions column of a specific template.
The following pop-up window appears on the screen.

- Click Delete template.
Sort templates
The Add filter feature helps to sort and view the Template table results with the help of AND and OR operands.
To sort table results, follow these steps:
- Click the Add filter button above the Template table results.
A Search drop-down appears, displaying all the column names in the list.

- Select a filter criterion and click Apply.

The relevant results will appear on the screen.
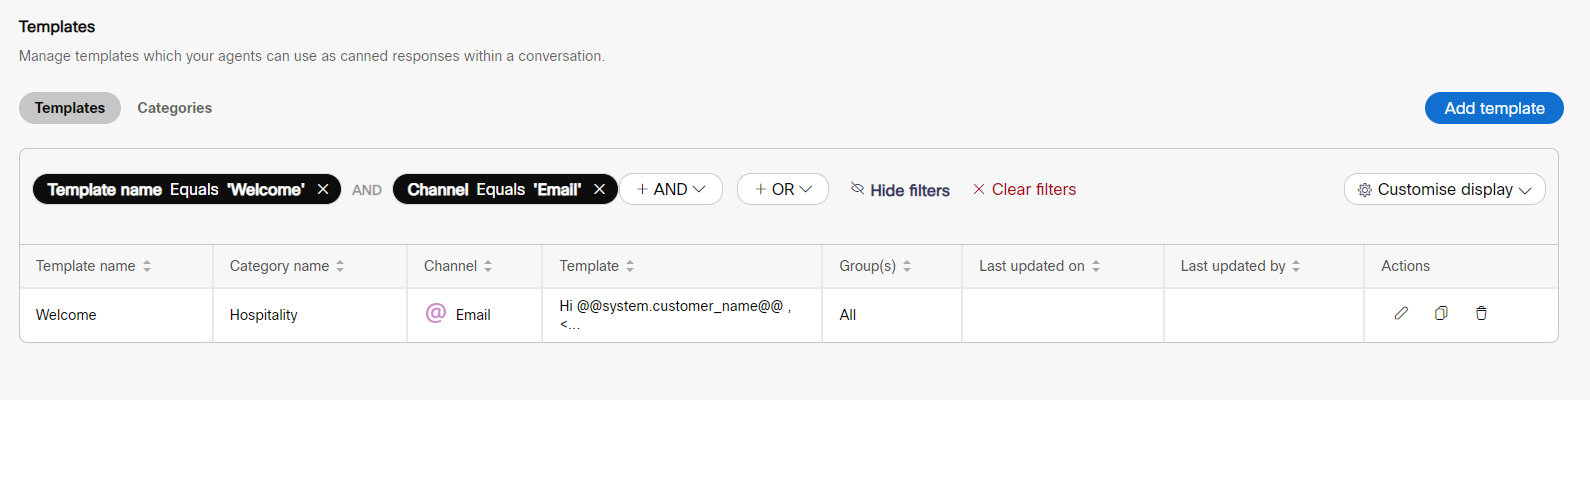
- You can further sort the table results using the AND and OR operands.
- You can click the Hide filters button to hide the existing filters.
- You can also click the Clear filters button to reset or clear the existing filters.
Customise Display of Table
The Customise Display helps you select a list of columns you want to preview in the table results.
To view customise table results, follow these steps:
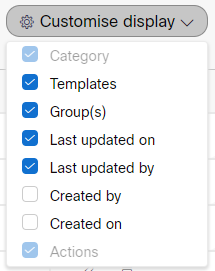
- Click the Customise display drop-down on the top-right corner of the results table.
- Choose the required columns from the list by selecting the checkboxes adjacent to each column name.

You can instantly view the results on the screen by checking and unchecking the checkboxes.
Note
By default, Template name and Actions columns are preselected and cannot be disabled.
Categories
A group of templates can be organized under a category. You can create categories under the Categories tab. A folder icon precedes each category. A category with templates is represented with a filled folder icon, whereas an empty folder icon represents the one without templates.
Add a Category
To add a category, follow these steps:
- Login to Webex Engage.
- Click the Try new version button on the top-right corner of the application.
- Navigate to Assets> Templates.
- Click the Categories tab.
The following screen appears.
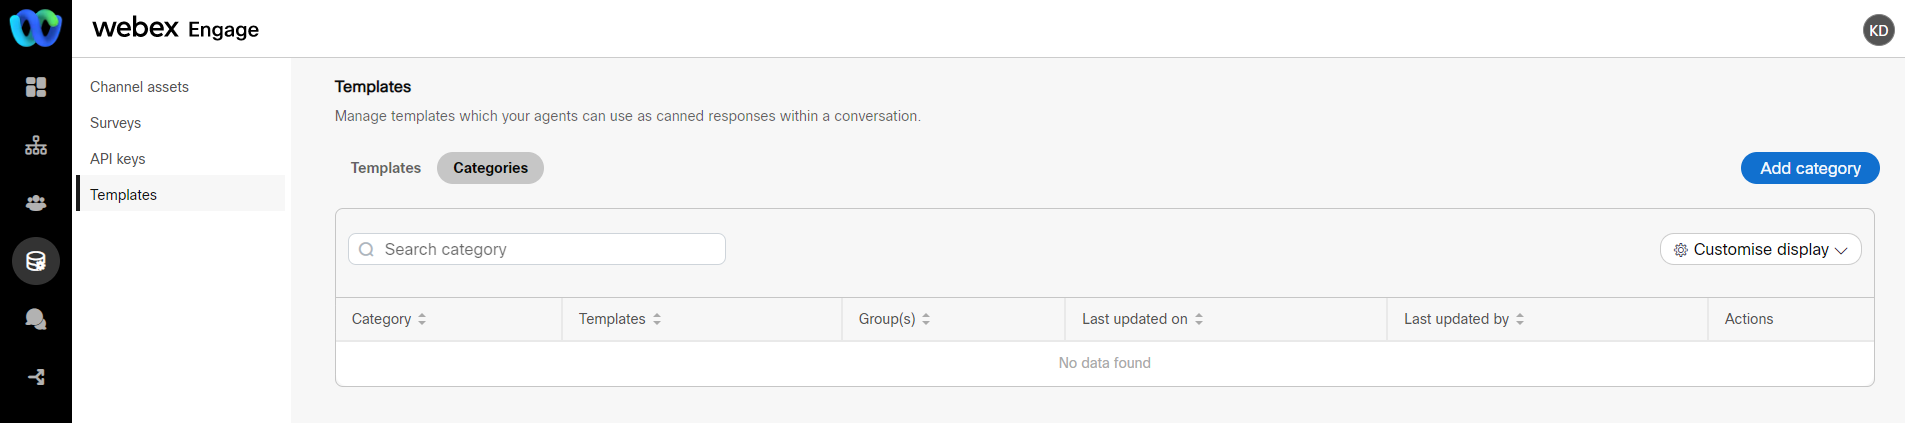
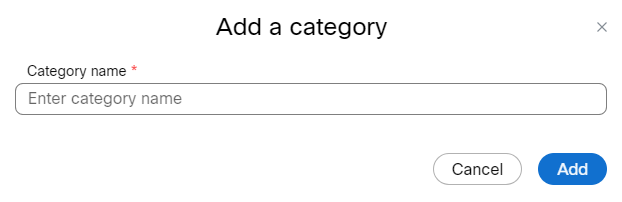
- Click Add category on the top-right corner of the screen. The following pop-up window appears on the screen.
Note
The maximum character limit allowed for the Category name field is 35.
- Enter the Category name and click Add. A success message appears; the category is listed in the table results.

Edit a Category
To edit a category, follow these steps:
- Click the Edit icon in the Actions column of a specific category.

The following pop-up window appears on the screen.

- Edit the Category name and click Save changes.
Delete a Category
To delete a category, follow these steps:
- Click the Delete icon in the Actions column of a specific category.

The following pop-up window appears on the screen.
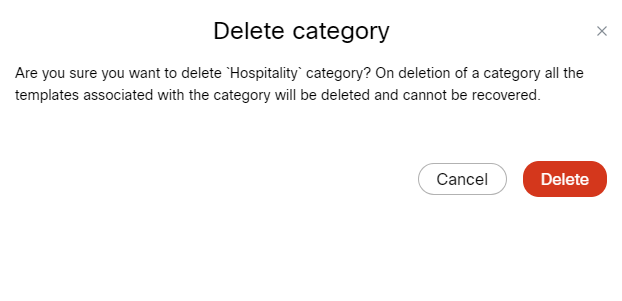
- Click the Delete icon.
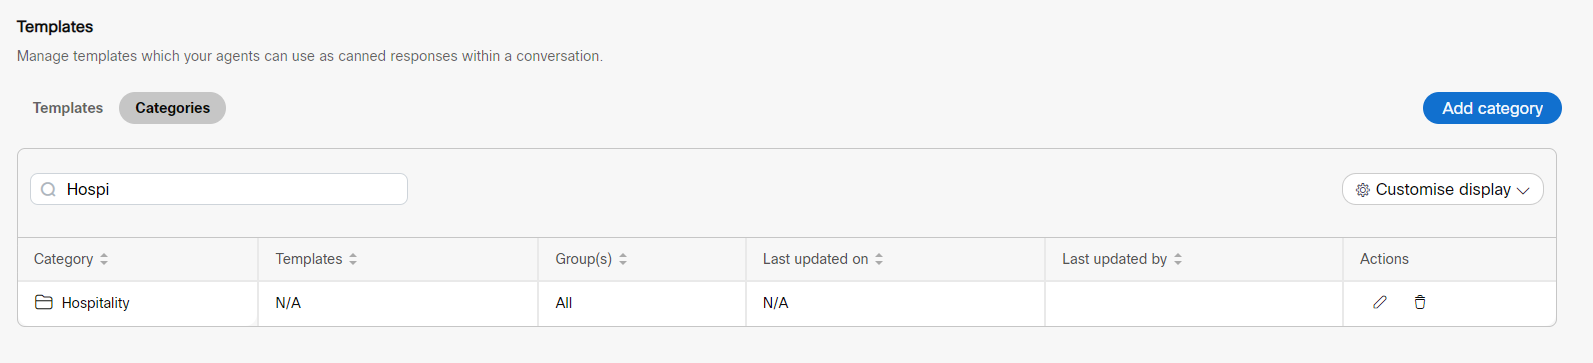
Search categories
To search a category, enter the search criterion in the Search field. The respective results will appear on the screen.
Customise Display of Table
The Customise Display helps you select a list of columns you want to preview in the table results.
To view customise table results, follow these steps:
- Click the Customise display drop-down on the top-right corner of the results table.
The following drop-down appears.
- Choose the required columns from the list by selecting the checkboxes adjacent to each column name.
You can instantly view the results on the screen by checking and unchecking the checkboxes.
Note
By default, Category name and Actions columns are preselected and cannot be disabled.
Updated over 2 years ago