
Customers
You can manage customer profiles, view recently contacted customer details, and ban a Livechat customer from contacting the agents by blocking their IP address on the Customers screen.

Customer profiles
You can create customer profiles by adding the customer's Mobile number, Email ID, or both while creating profiles. Users can merge the two different customer profiles to maintain conversation history in a single profile. Further, users can search the table results to view the desired profile details. They can even play across with the table results by hiding and viewing only selected columns in the Customise display drop-down.
Add a customer profile
To add a customer profile, follow these steps:
- Login to Webex Engage and click the Try new version on the top-right corner of the application.
The Webex Engage React application will launch. - Click the Customers menu on the left pane.
The following screen appears.
- Click the +Add customer profile on the top-right corner of the screen.
The following screen appears.
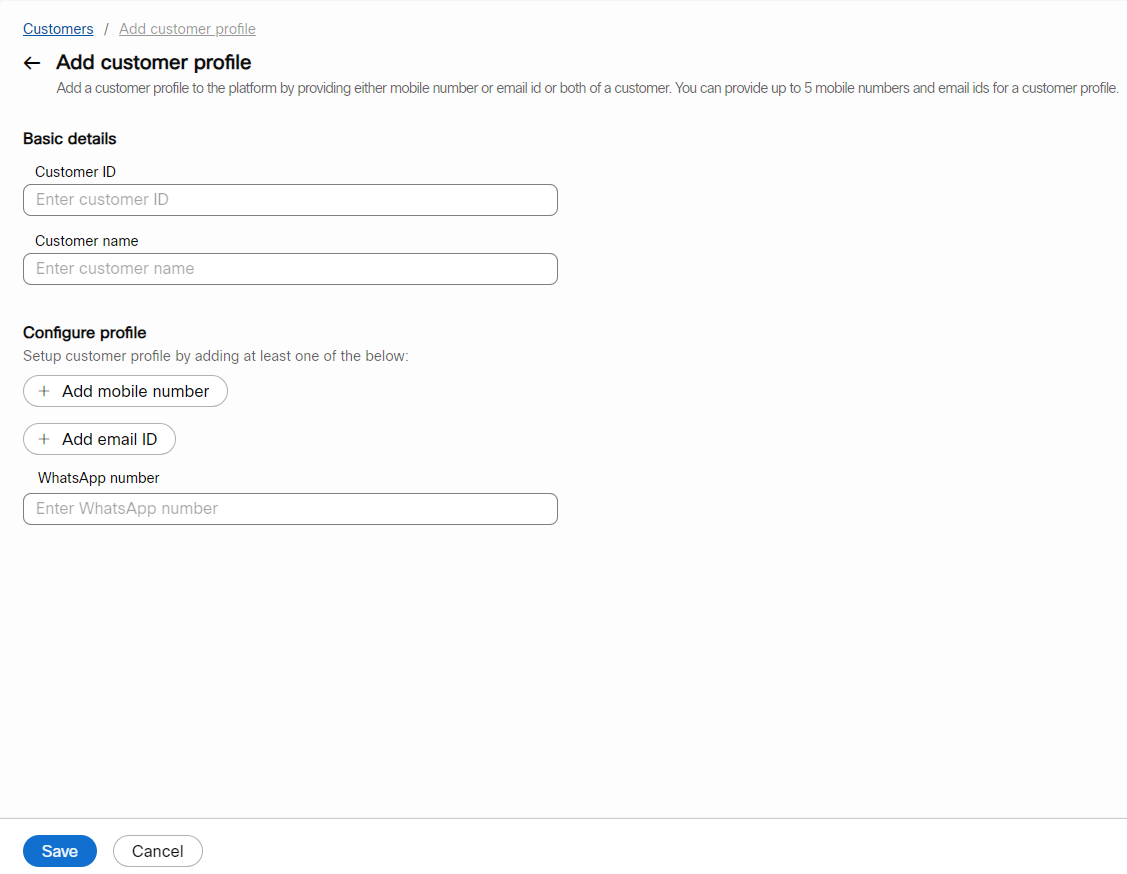
- Enter Customer ID and Customer name in the respective fields.
- Click the Add mobile number button to add a mobile number.
- Click the Add email ID button to add an email ID.
Note
You can add up to Five Mobile numbers or Email IDs for each profile under the Customers menu.
Click the Add mobile number and Add email ID buttons to add multiple mobile numbers and email IDs.
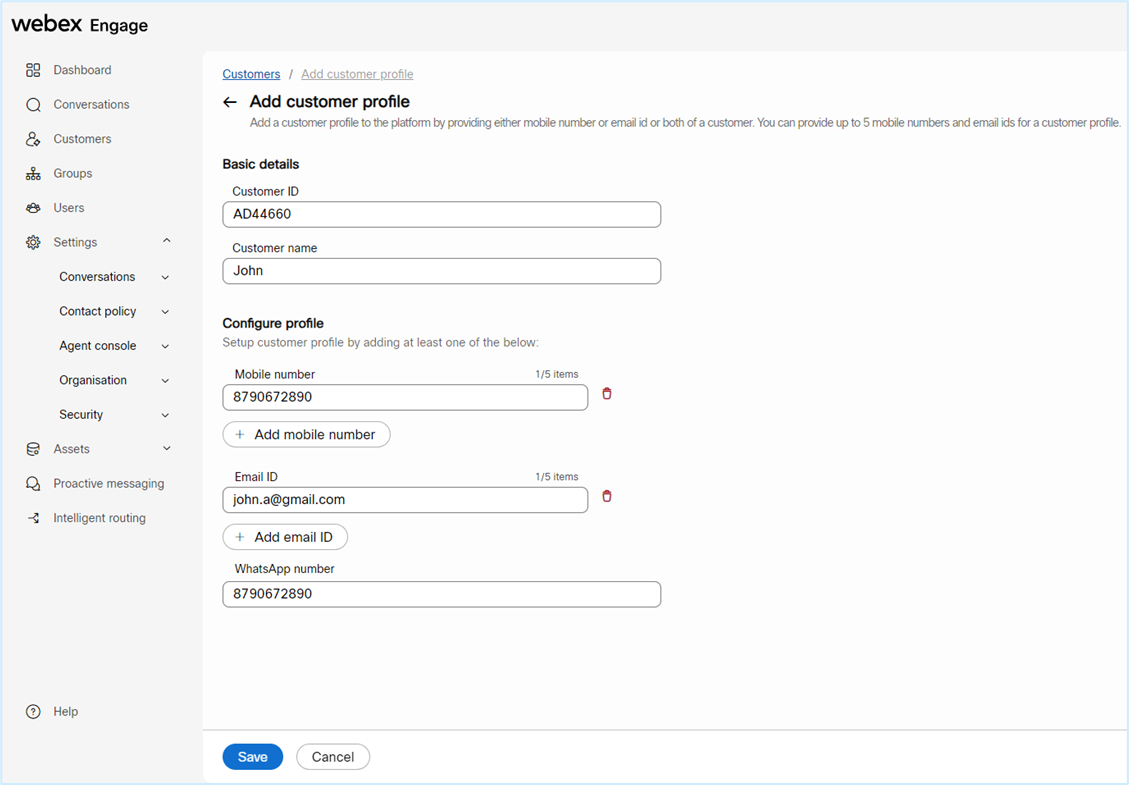
- Click the Delete icon beside the mobile number and email IDs to delete the details.
- Enter the WhatsApp number in the WhatsApp number field.
- Click Save.
Edit a customer profile
To edit a customer profile, follow these steps:
- Login to Webex Engage and click the Try new version on the top-right corner of the application.
The Webex Engage React application will launch. - Click the Customers menu on the left pane.
The following screen appears.

- Click the Edit icon in the Actions column of the table results.
The following screen appears.
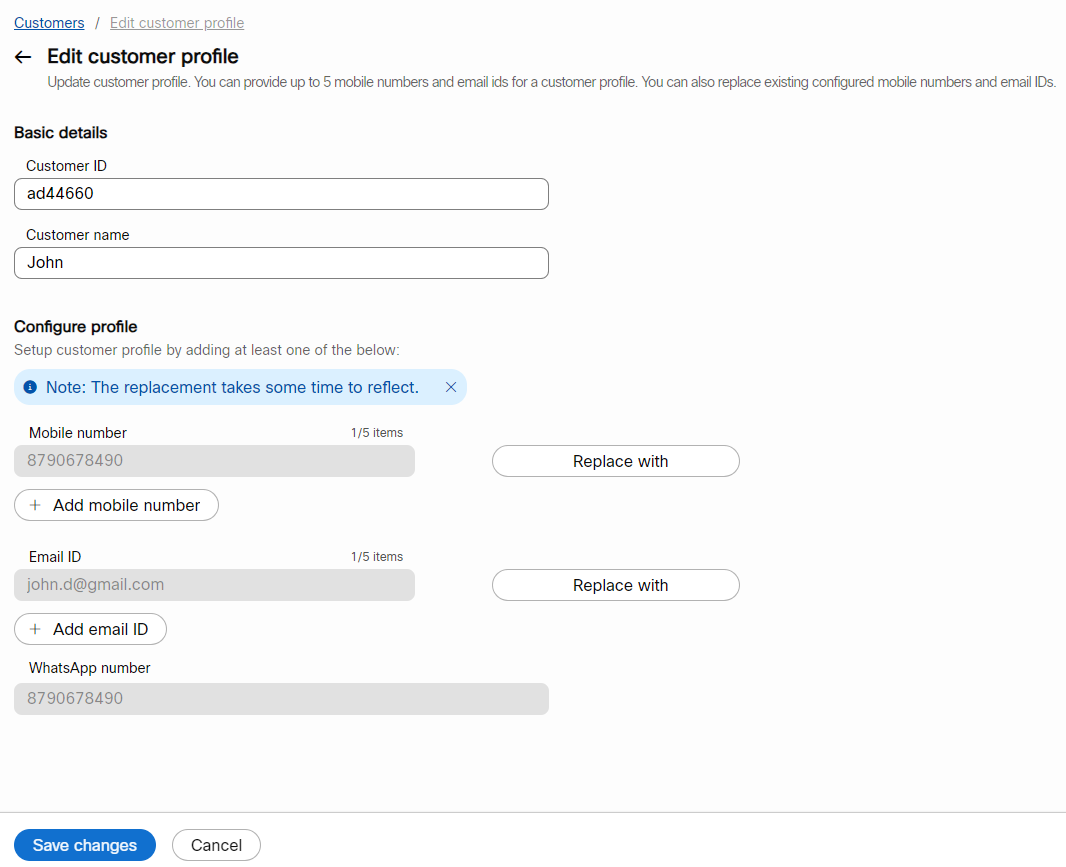
- If required, change the Customer ID and name.
- Click the Replace with button to change the existing Mobile number or Email ID.
When you click Replace with, you will view a text field adjacent to it.
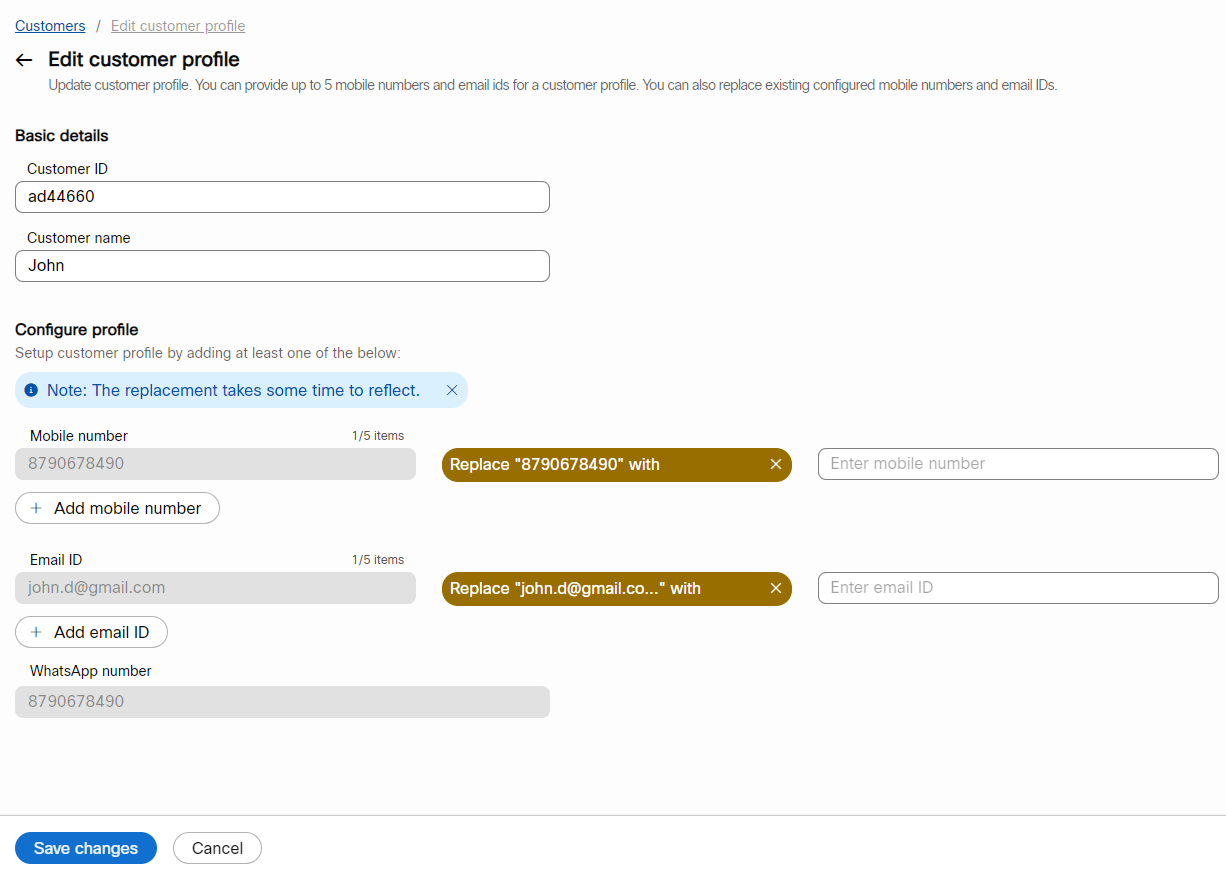
- Enter the new profile details in the new fields and click Save changes.
Merge a customer profile
To merge a customer profile, follow these steps:
- Login to Webex Engage and click the Try new version on the top-right corner of the application.
The Webex Engage React application will launch. - Click the Customers menu on the left pane.
The following screen appears.

- Click the Merge icon in the Actions column of the table results.
The following pop-up window appears.
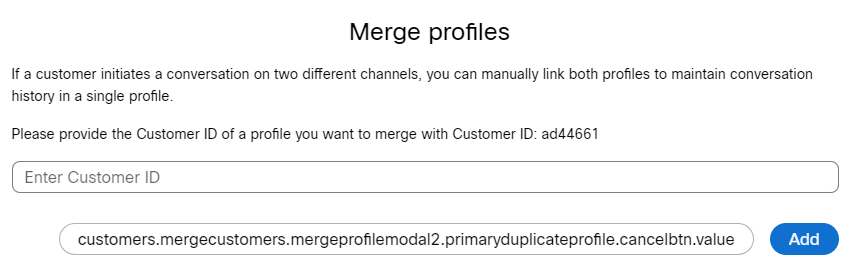
- Enter the Customer ID and click Add.

- Click Merge profile.
A success message appears on the screen.
Banned customers
To prevent brute force attacks and discourage disruptive behavior, you can block the user's IP addresses that may pose a threat to customer data on the React application. You can manage the customer IP addresses, search for a desired IP address, and view customized table results by hiding/viewing the required columns in the Customise display drop-down on the Banned customer's screen.
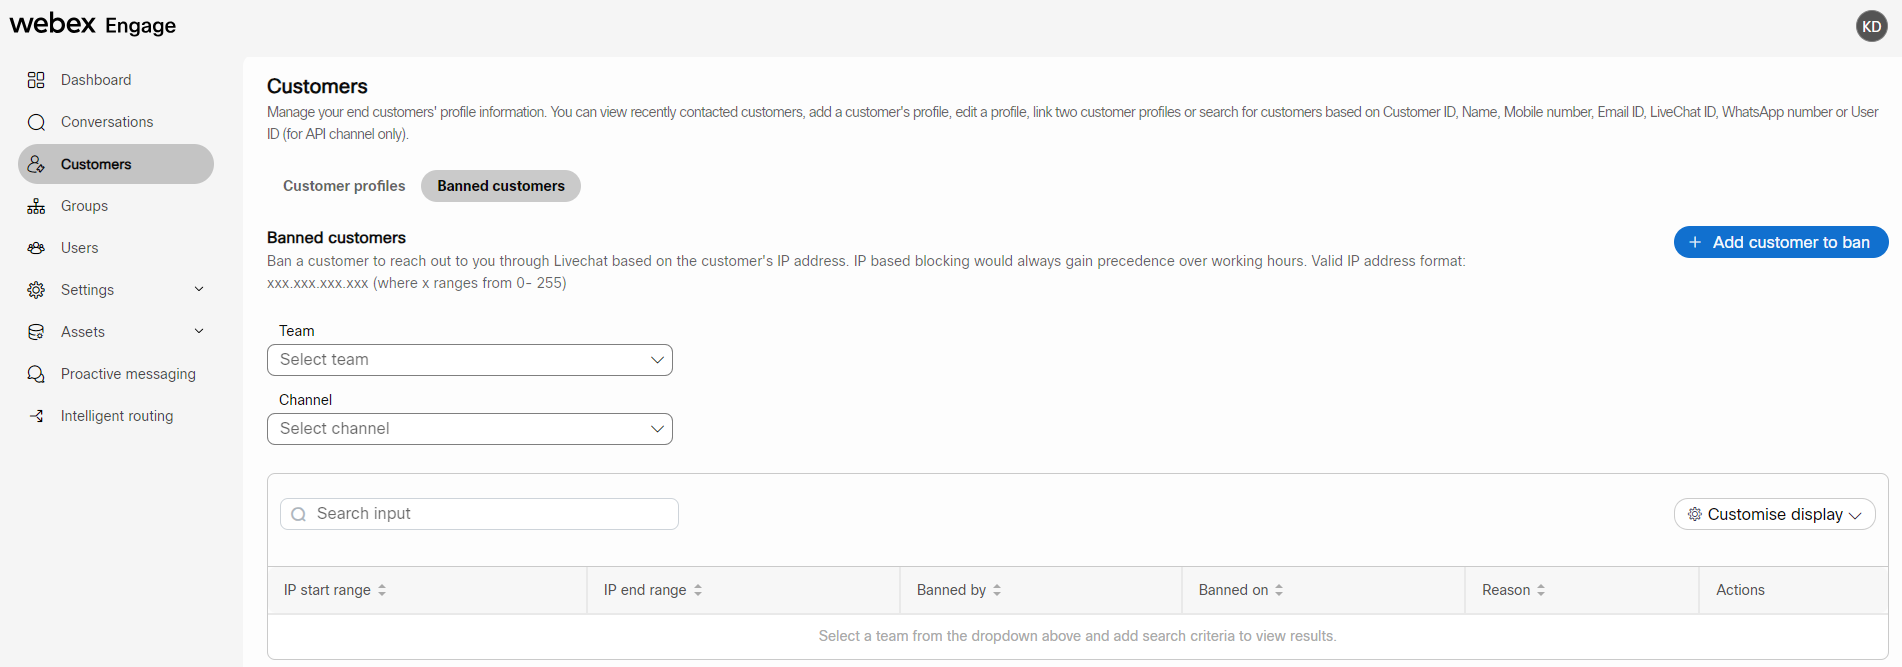
Add IP
To add a customer to the ban list, follow these steps:
- Login to Webex Engage and click the Try new version on the top-right corner of the application.
The Webex Engage React application will launch. - Click the Customers menu on the left pane.
The following screen appears.
- Click the Banned customers tab.
The following screen appears.

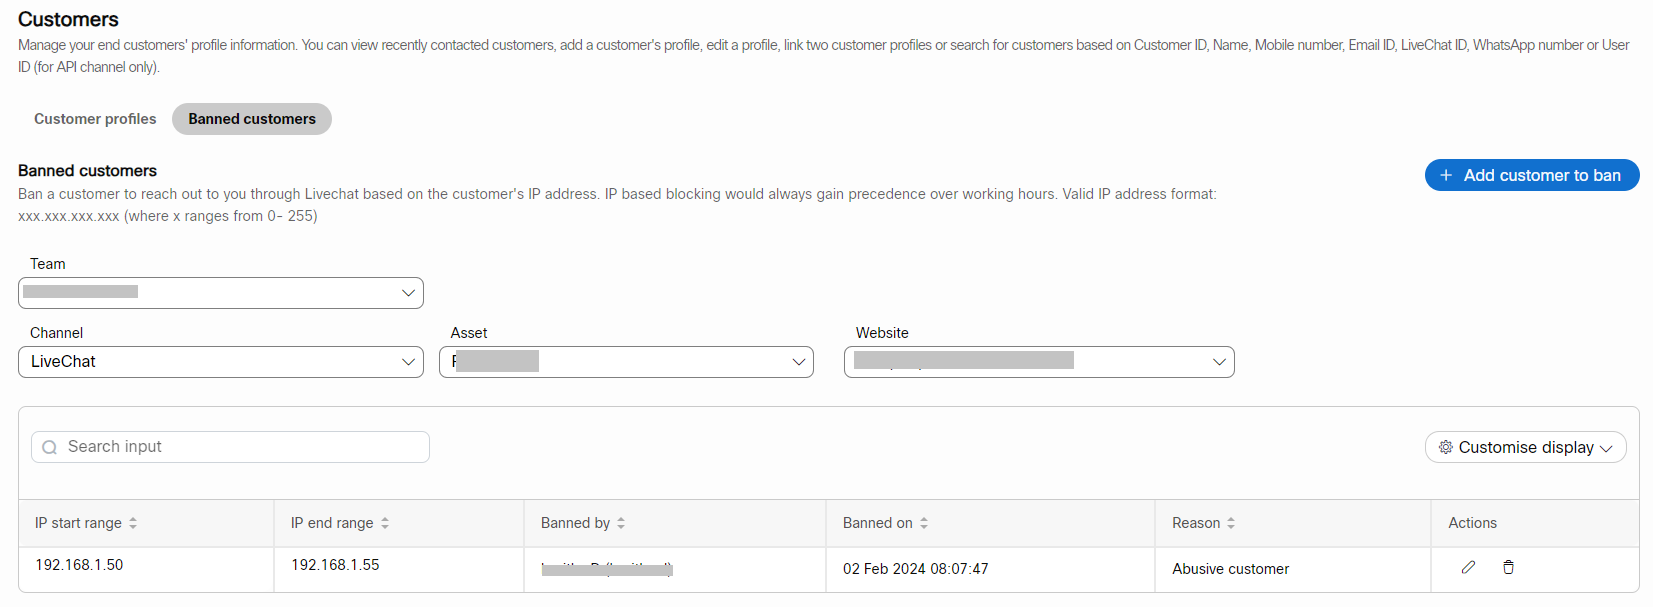
- Select a team from the Teamdrop-down list. The Asset drop-down field appears adjacent to the Channel drop-down list.
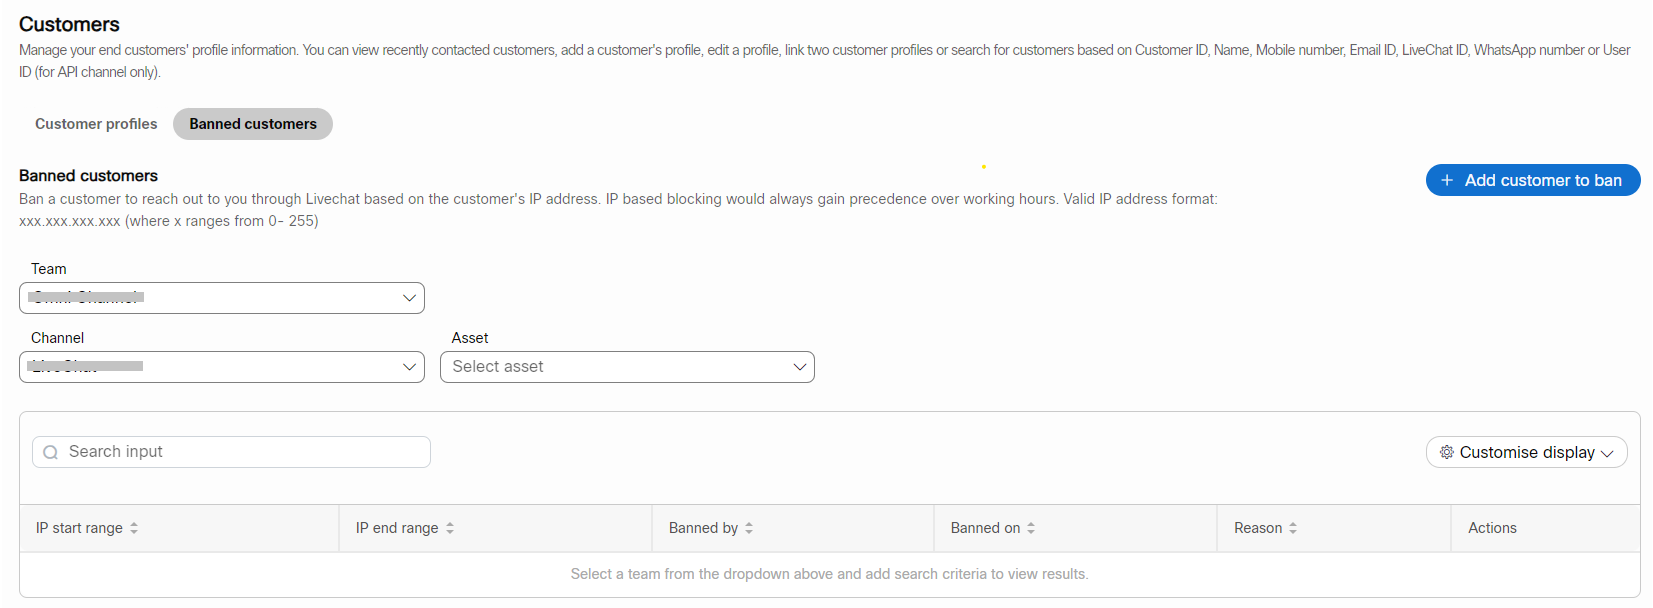
- Select a channel from the Channel drop-down list.
- Select an asset from the Asset drop-down list. The Website field appears adjacent to the Asset drop-down list.
- Select a Website from the Website drop-down list.
- Click the +Add customer to ban on the top-right corner of the screen. The following pop-up window appears on the screen.
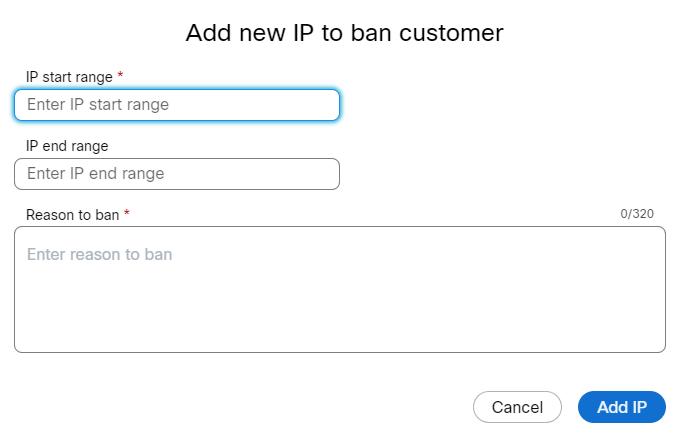
- Enter the IP start and end range in the IP start range and IP end range fields.
- Enter the reason behind banning the IP address in the Reason to ban field. The maximum length of the Reason to ban field is 320 characters.

- Click Add IP.
A success message appears on the screen.
Edit IP
To edit the IP details of the customers, follow these steps:
- Login to Webex Engage and click the Try new version on the top-right corner of the application.
The Webex Engage React application will launch. - Click the Customers menu on the left pane.
The following screen appears.
- Click the Banned customers tab.

- Click the Edit icon in the Actions column of a specific user's IP details.
The following pop-up window appears on the screen.
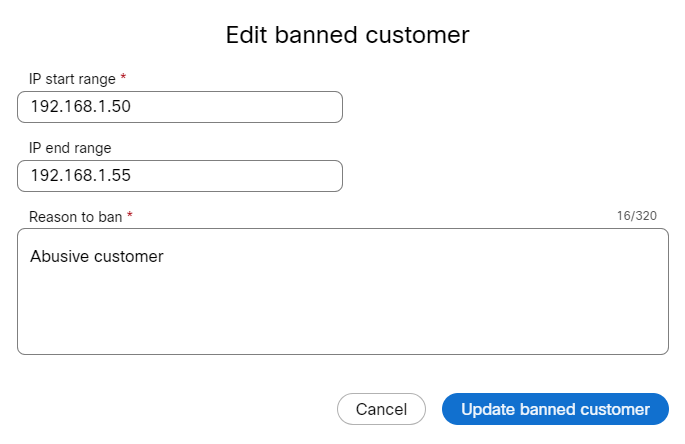
- Edit the required fields and click the Update banned customer button.
The success message appears on the screen.
Delete IP
To delete the IP details of the customers, follow these steps:
- Login to Webex Engage and click the Try new version on the top-right corner of the application.
The Webex Engage React application will launch. - Click the Customers menu on the left pane.
The following screen appears.
- Click the Banned customers tab.
- Click the Delete icon in the Actions column of a specific user's IP details.
The following information pop-up window appears on the screen.
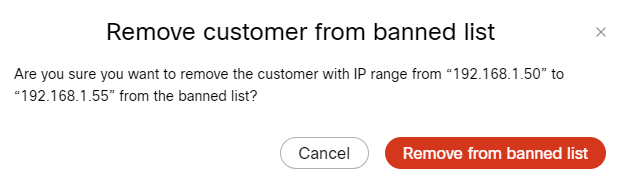
- Click Remove from banned list.
A success message appears on the screen.
Search for customer details/banned IP address
Enter the search criteria in the Search field to search for customer details or banned IP addresses. The respective results will appear on the screen.

Customise customers/banned customers
The Customise display helps you select a list of columns you want to preview in the table results.
To view customise table results, follow these steps:
- Click the Customise display drop-down on the top-right corner of the results table.
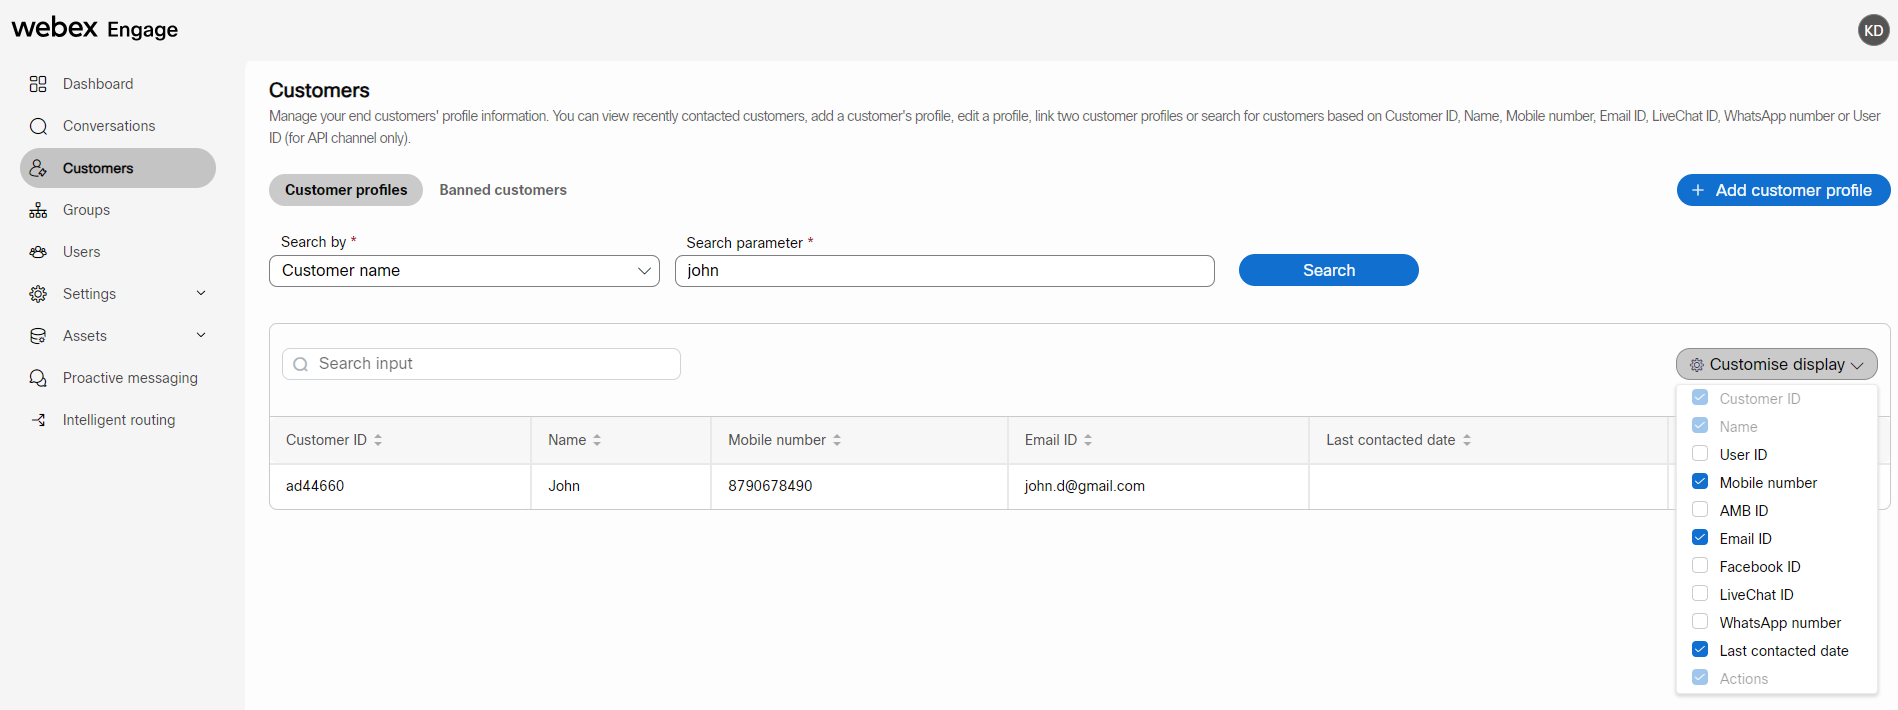
- Choose the required columns from the list by selecting the checkboxes adjacent to each column name.
You can instantly view the results on the screen by checking and unchecking the checkboxes.
Note
By default, Customer ID, Name, and Actions columns are preselected and cannot be disabled.
Updated over 2 years ago