
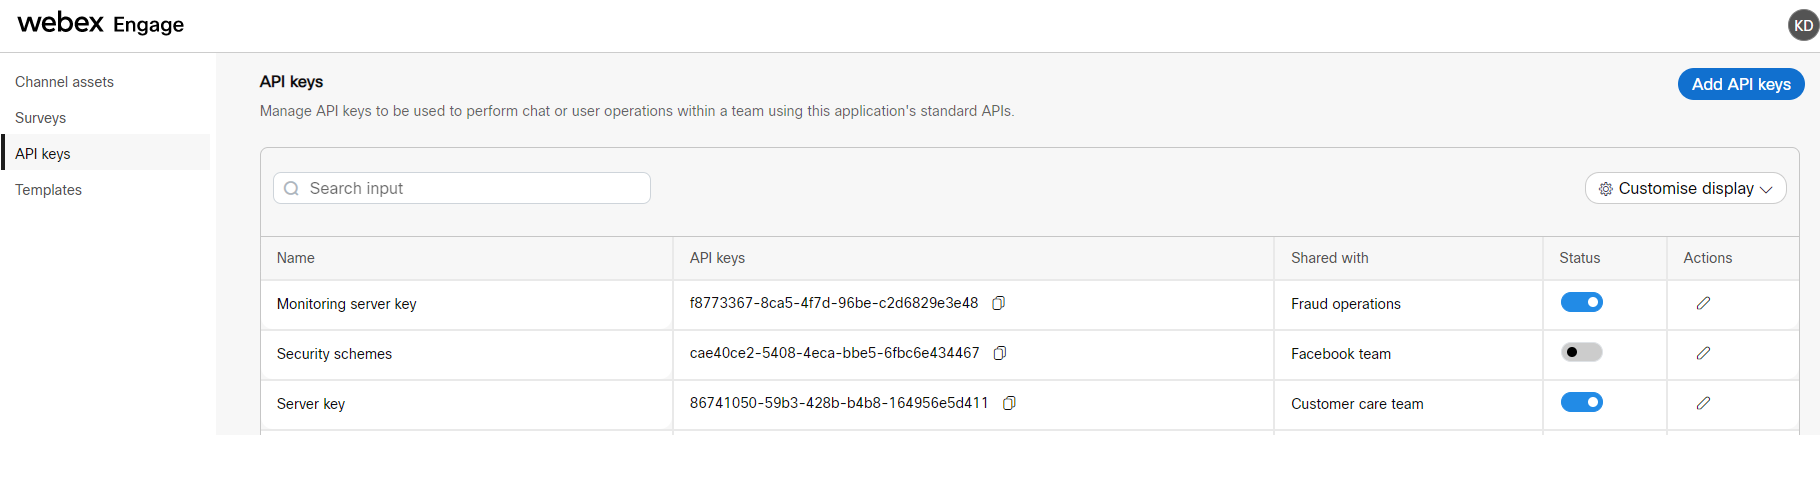
API keys
You can configure API keys to facilitate the usage of Webex Engage's APIs for chat creation and user management.
Add an API key
To add API keys, follow these steps:
- Login to the Webex Engage.
- Click the Try new version button on the top-right corner of the application.
- Navigate to Assets> API keys.
- Click Add API keys on the top-right corner of the screen.
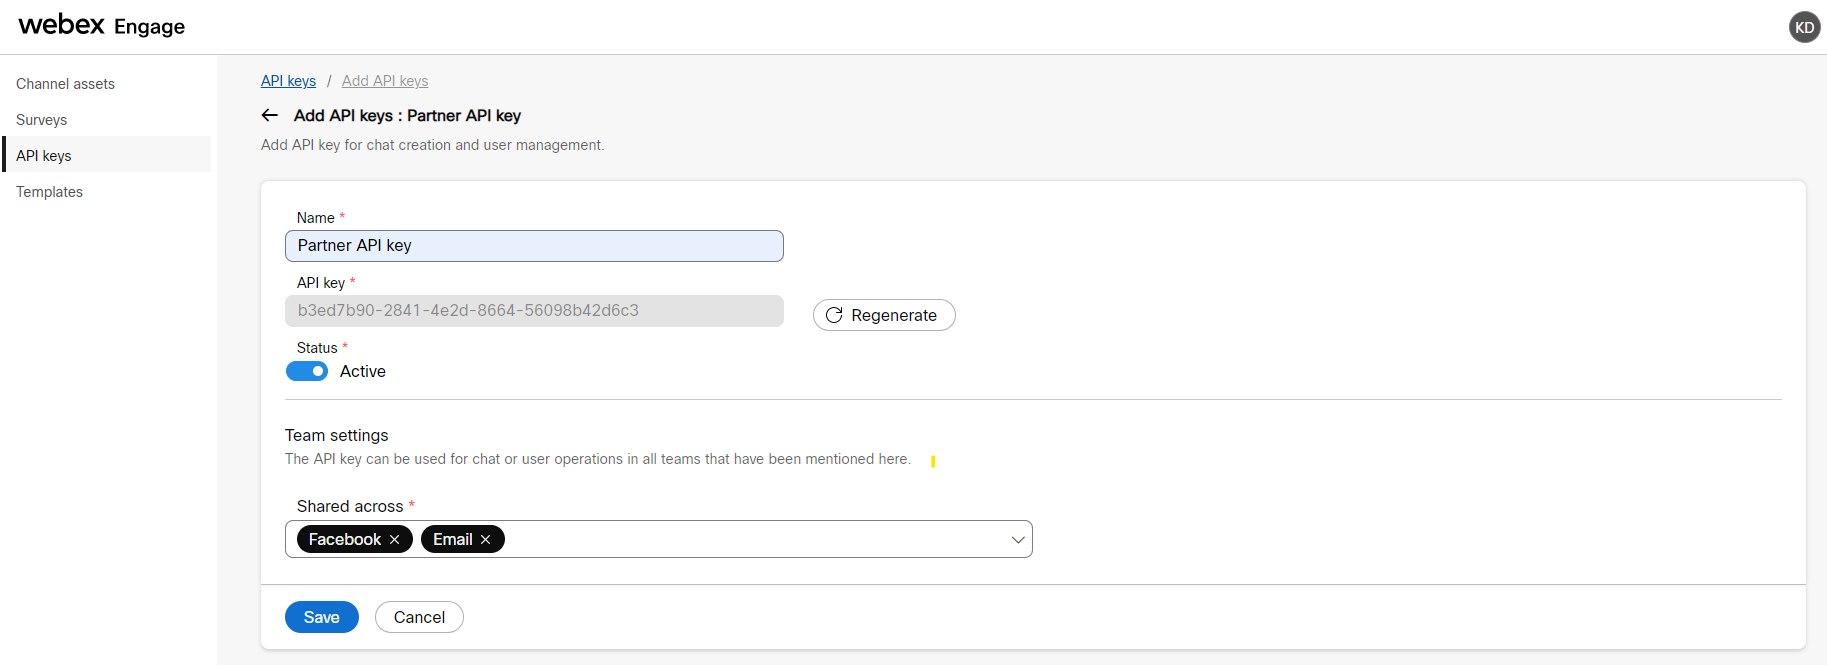
- Enter the API key name in the Name field.
- An API key is auto-generated. However, you can refresh by clicking the Regenerate button adjacent to the API key field.
- Turn ON the Status toggle to Active.
- Select the Teams from the Share across drop-down list to which this key must be shared. The API key can be used in conversations or user operations in all teams mentioned in the Shared across field.
- Click Save.
A success message appears on the screen.
Edit an API key
To edit API keys, follow these steps:
- Click the Edit icon in the Actions column of a specific API key.
The following screen appears.
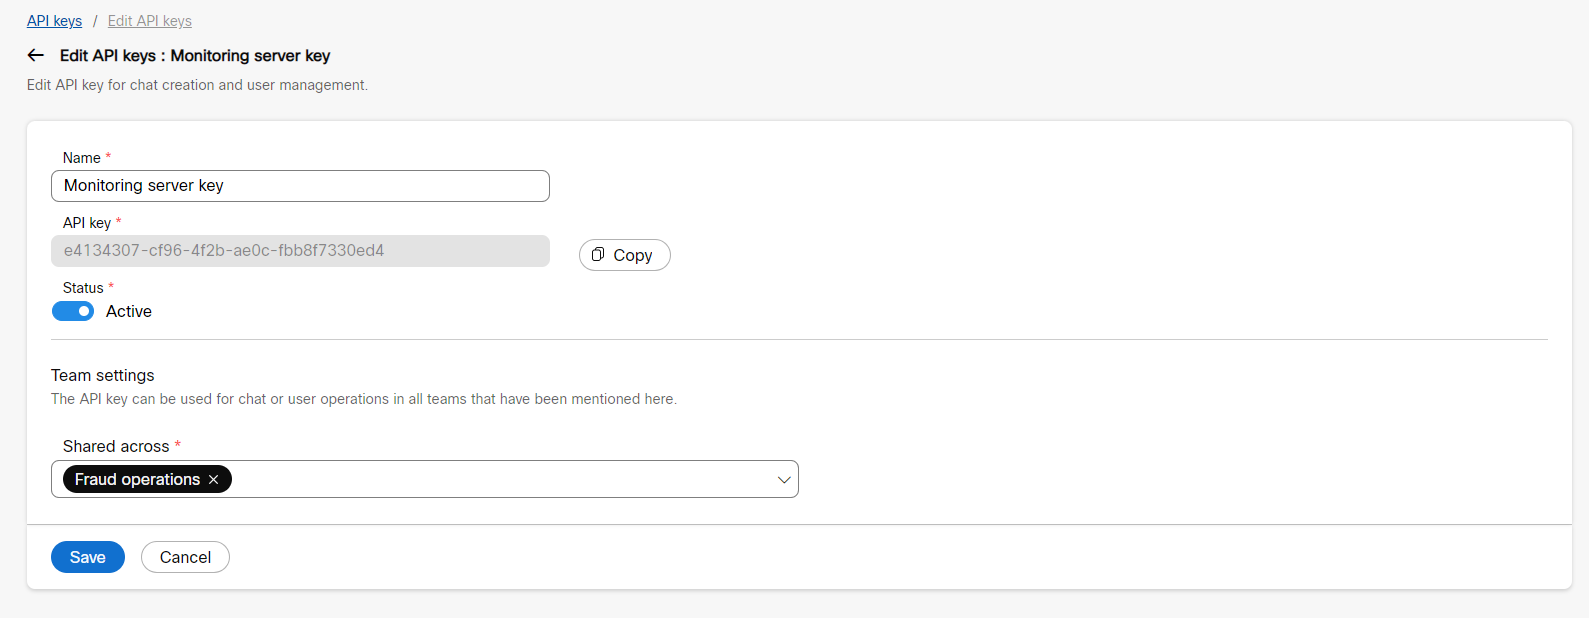
- Edit the required fields and click Save.
Search an API key
Enter the search criterion in the Search field to search for the API key. The respective results will appear on the screen.
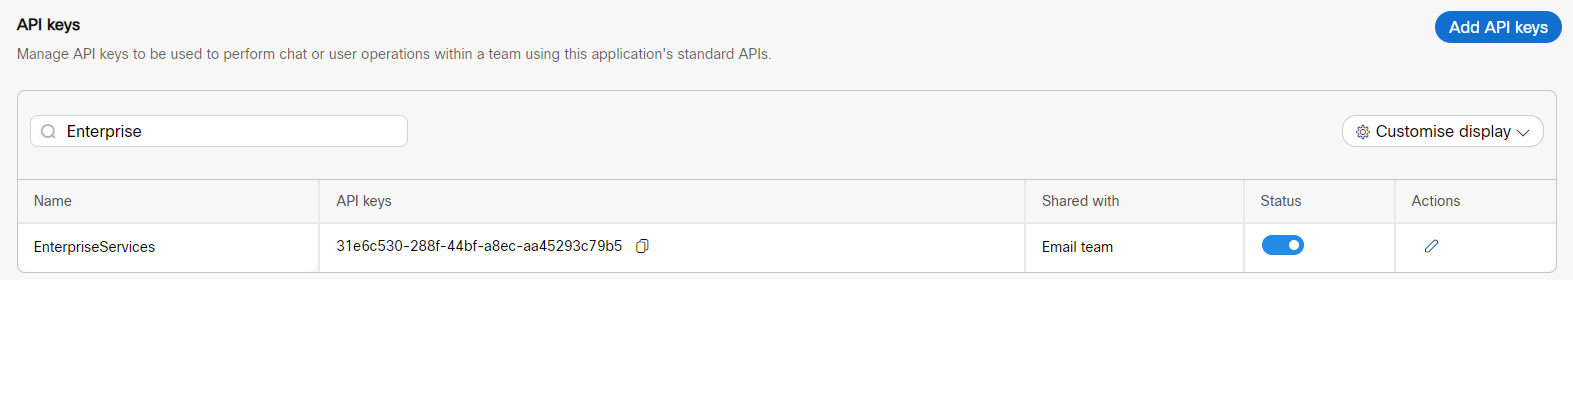
Further, you can enable/disable the API keys from the table results by turning On/Off the toggle available in the Status column.
Customise Display of Table
The Customise Display helps you select a list of columns you want to preview in the table results.
To view customise table results, follow these steps:
- Click the Customise display drop-down on the top-right corner of the results table.
The following drop-down list appears.
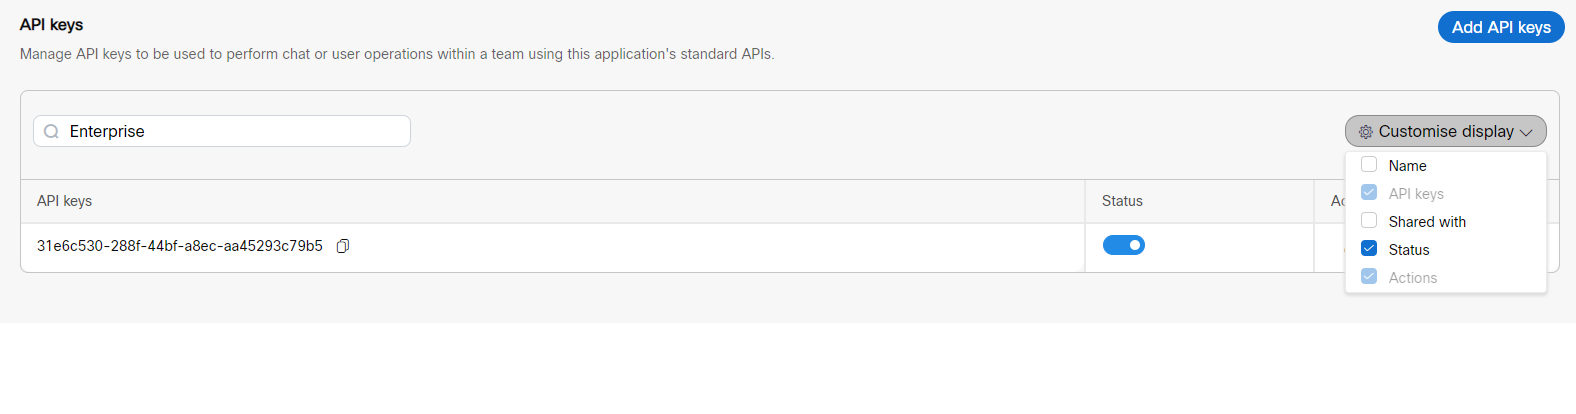
- Choose the required columns from the list by selecting the checkboxes adjacent to each column name.
You can instantly view the results on the screen by checking and unchecking the checkboxes.
Note
By default, API keys and Actions columns are preselected and cannot be disabled.
Updated over 2 years ago