
Proactive Messaging
The proactive messaging feature enables client admins to configure contextual messages to support customers and engage them in a conversation. These messages can be triggered based on visitor attributes such as the Current Page URL, Time Spent on the Page, etc., and HTML events (such as On Click, On Change, etc.) on the business's website.
Add a Proactive Message
To configure a proactive message, follow these steps:
-
Login to the Webex Engage application.
-
Click the Try new version button on the top-right corner of the application.
The Webex Engage React application will launch.
- Click the Proactive messaging menu.
The following screen appears.
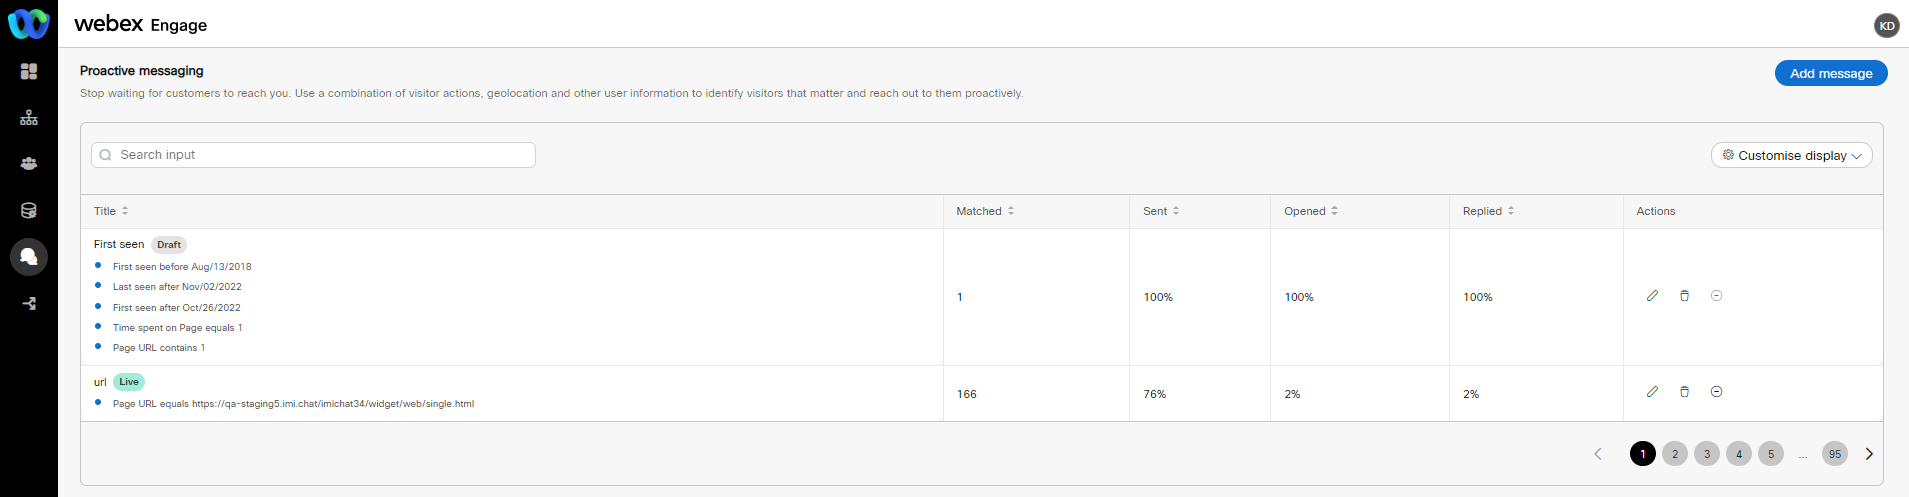
- Click the Add message button on the top-right corner of the screen.
The following screen appears.
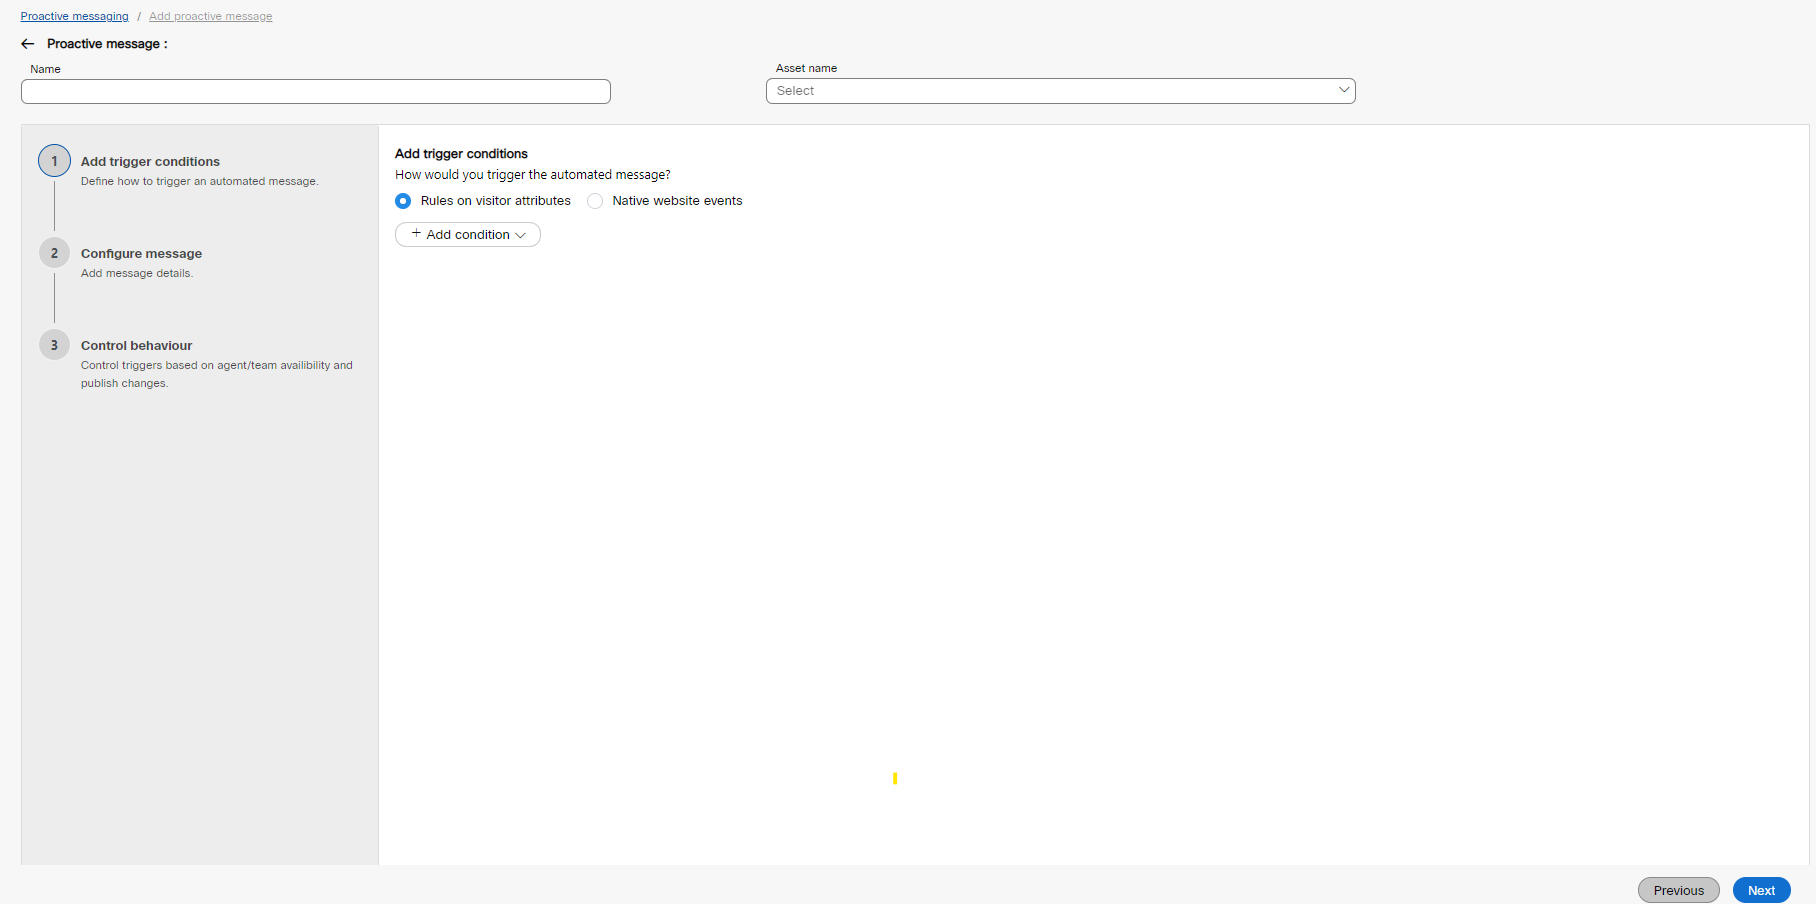
- Enter Name.
- Select the asset from the Asset name drop-down list.
Adding a proactive message on Webex Engage is a three-step process:
- Add trigger conditions
- Configure messages
- Control behaviour
You can trigger an automated message using Rules on visitor attributes or Native website events.
- If you choose the Rules on visitor attributes radio button, the Add conditions drop-down appears on the screen.
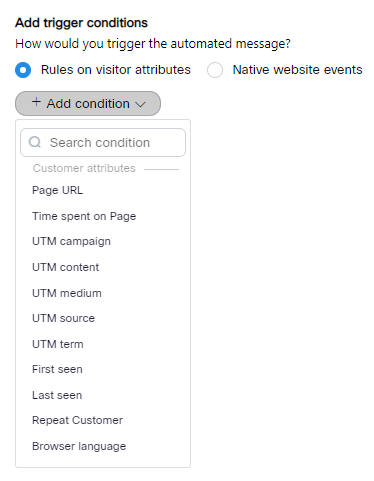
- Add a condition using the attributes available in the drop-down.

- Click Next.
- If you select the Native website events radio button, the following options appear on the screen.
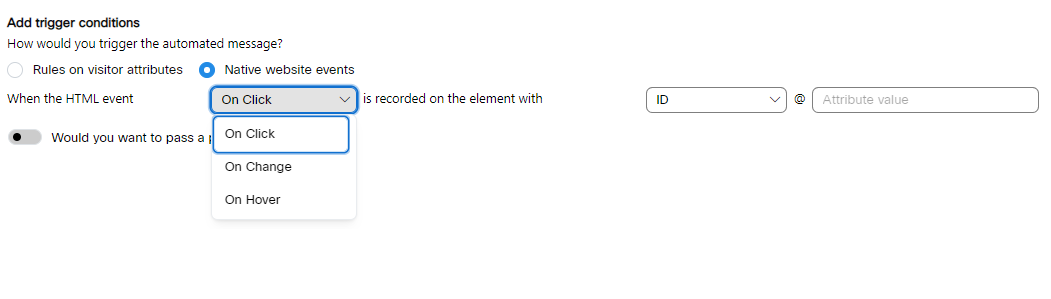
- Select whether to trigger an event On Click / On Change/ On Hover from the respective drop-down list.
- Select the element ID/ Class name from the drop-down list and enter the Attribute value.
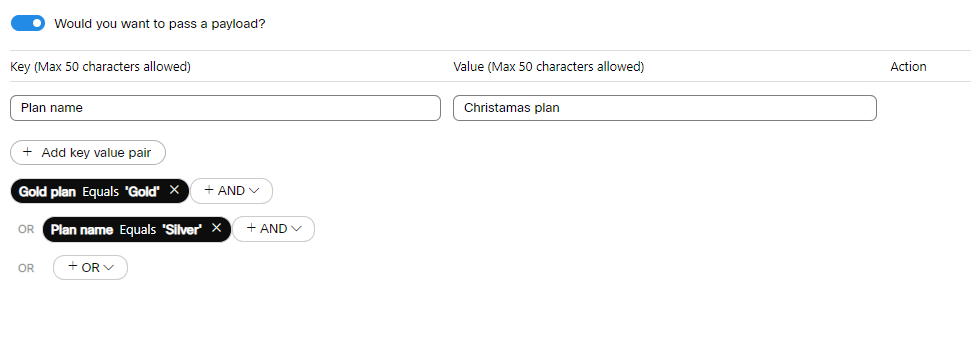
- Turn ON the Would you want to pass the payload toggle to pass the payload. The following options appear on the screen.
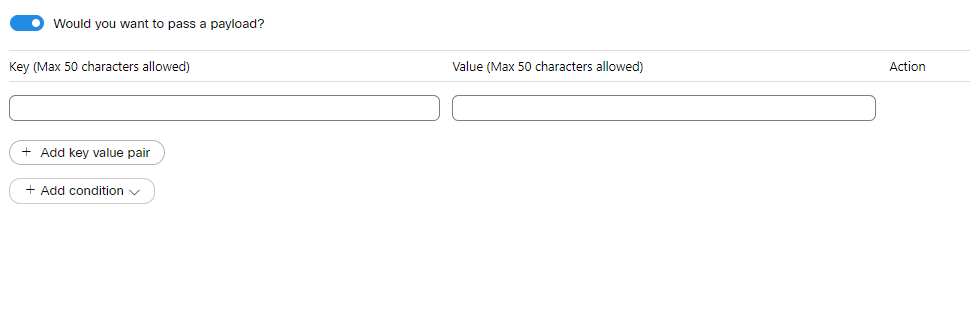
- Enter the Key and Value.
- Click Add a condition to add a Condition.
- Click Next.
You will navigate to the Configure message screen.
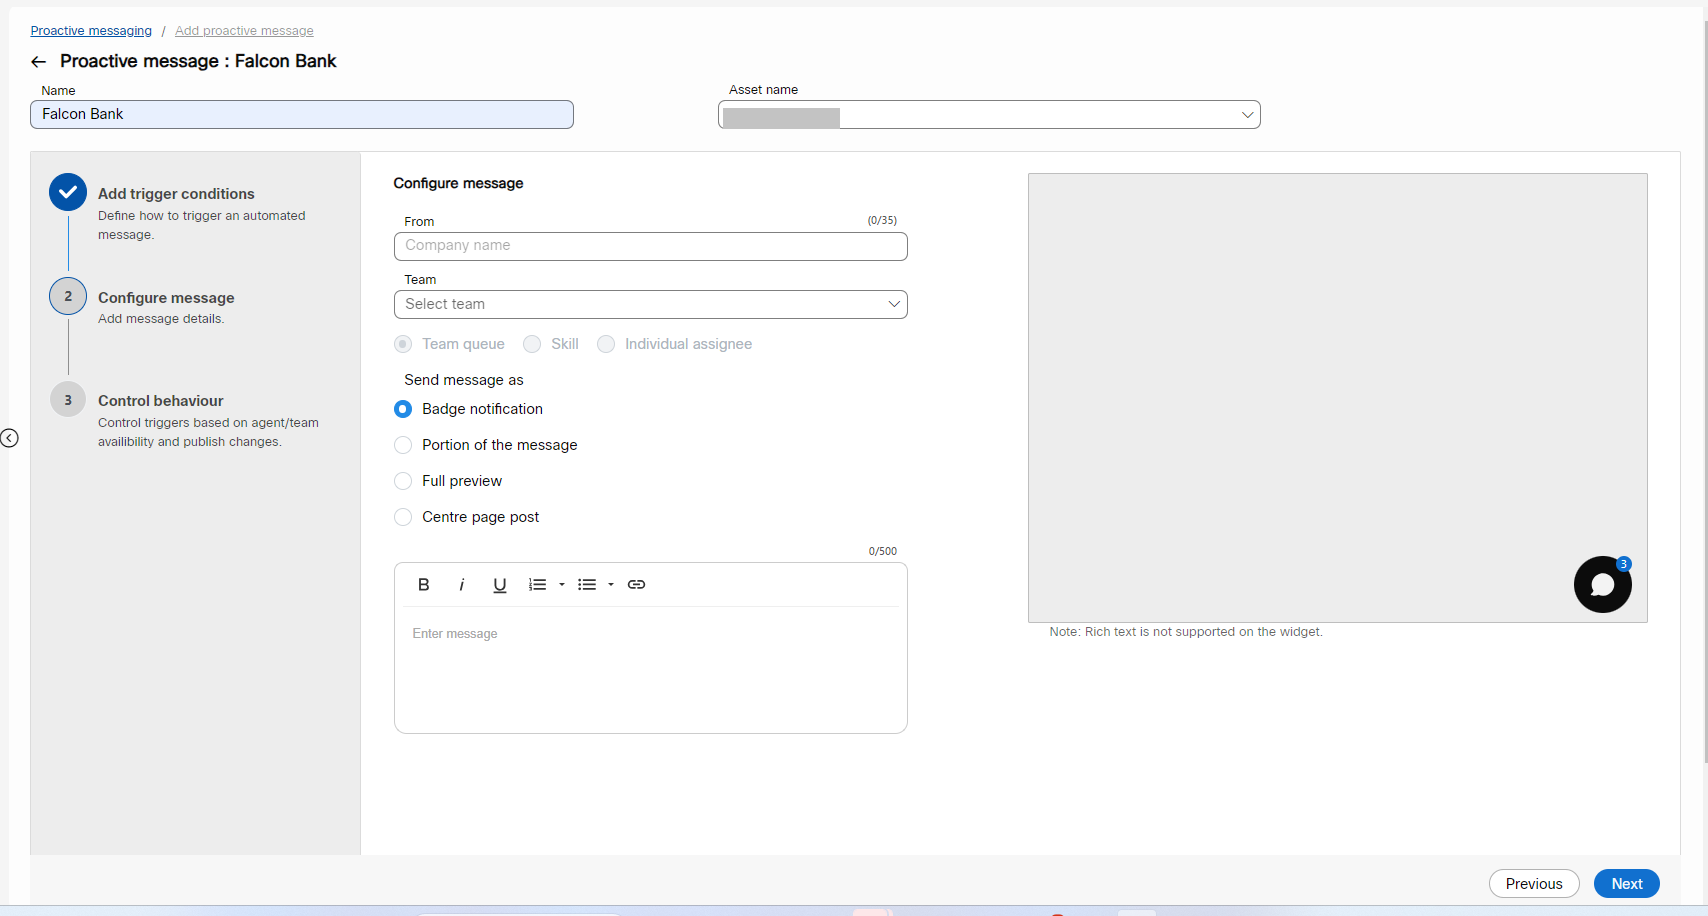
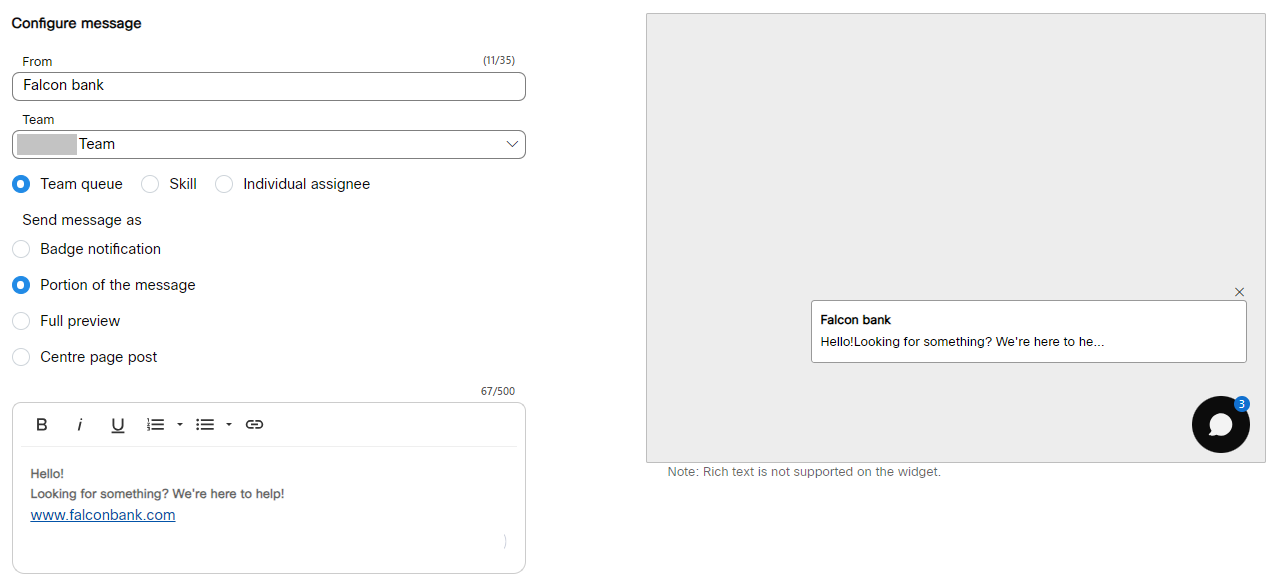
- Enter From name (company name).
- Select Team from the Teams drop-down list.
You can route the response to Team queue, Skill, or Individual assignee. All the options will be enabled after the Team selection. - If you select the Team queue radio button, the Send message as radio buttons will appear on the screen.
- Badge notification: This notification displays as a silent notification. The customers have to click on the notification to view the message.

Portion of the message : This notification displays only a portion of the message. The customers have to click on the ellipses to view the complete message.
Full preview: This notification displays the complete message.
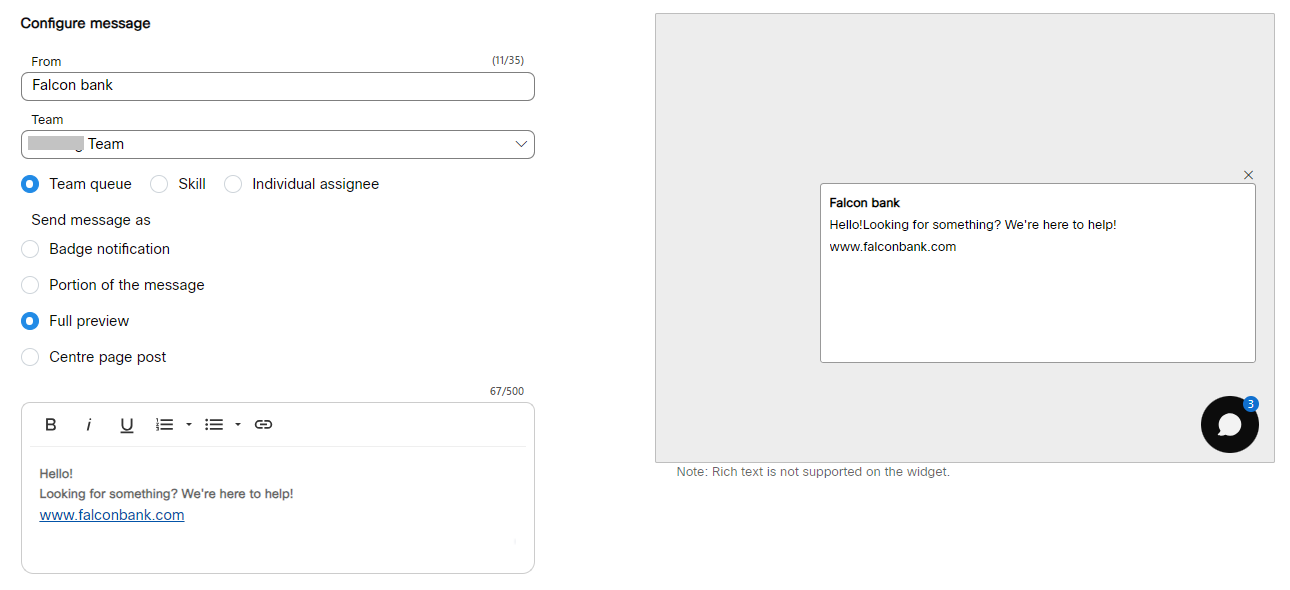
Centre page post: This notification displays a message at the center of the page. Generally, this can be used to provide mandatory information to the customer.

- Select the required radio button and enter the message in the Message text field.
- You can apply the following rich formatting styles to the configured message:
- Bold
- Italic
- Underline
- Ordered List
- Unordered List
- Insert Link
Note
The maximum text limit allowed in the Message field is 500 characters.
- If you select the Skill radio button, then the Assign chats replied to drop-down list appears.
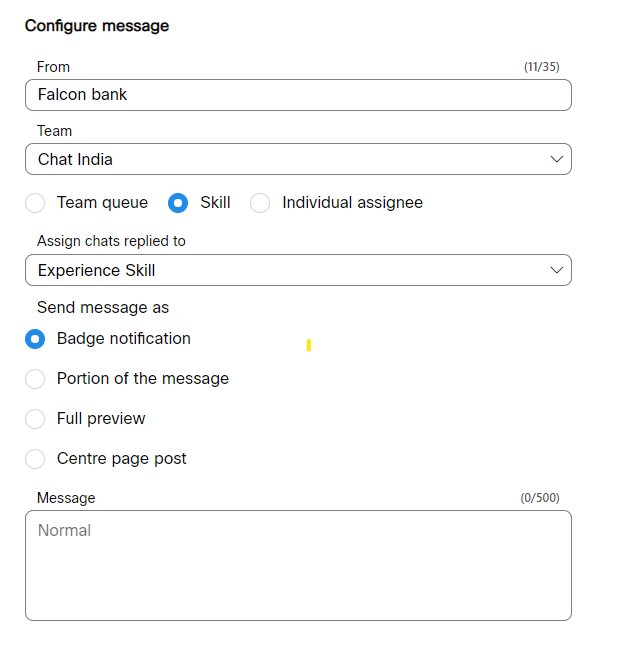
- Select the required skill from the Assign chats replied to drop-down list.
- If you select the Individual assignee radio button, the Assign chats replied to drop-down list appears.
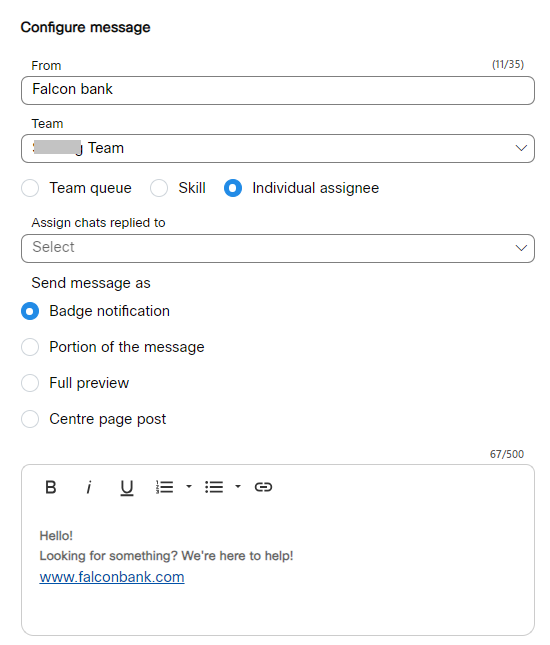
- Select an Agent's Email ID from the Assign chats replied to drop-down list.
- Click Next to continue. Otherwise, click Previous to view or change the previous page.
- You will navigate to the Control behaviour page if you click Next.

- Working Hours: Enable this toggle to check the working hours of the team the chat would be assigned to when the customer replies.
- Agent Availability: Enable this toggle to check the agent's presence in the team before sending a message.
- Slots Left : Enable this toggle to allow the application to calculate based on the current no. of agents logged in, threshold configured, active chats engaged in, chats waiting in the queue, and then sends the message to the appropriate number of visitors who match the business rule.
- Click Save and Publish to publish the message. Otherwise, click Save as draft to save the configured proactive message.
- Click Previous to view or change the settings on the previous page.
A success message appears on the screen.
Edit a proactive message
To edit a proactive message, follow these steps:
- Login to the Webex Engage application.
- Click the Try new version button on the top-right corner of the Admin or Customer Care console.
The Webex Engage React application will launch.
- Click the Proactive messaging menu.
The following screen appears.
- Click the Edit icon in the Actions column of a specific proactive message.
- Edit the required fields and click Save and publish to update the proactive message.
Delete a proactive message
To delete a proactive message, follow these steps:
- Login to the Webex Engage application.
- Click the Try new version button on the top-right corner of the Admin or Customer Care console.
The Webex Engage React application will launch.
- Click the Proactive messaging menu.
The following screen appears.
- Click the Delete icon in the Actions column of a specific proactive message.
Unpublish a proactive message
To unpublish a proactive message, follow these steps:
- Login to the Webex Engage application.
- Click the Try new version button on the top-right corner of the Admin or Customer Care console.
The Webex Engage React application will launch.
- Click the Proactive messaging menu.
The following screen appears.
- Click the Unpublish icon in the Actions column of a specific proactive message.
The following confirmation message appears on the screen.

- Click Unpublish. The proactive message will be unpublished, and the publish/unpublish icon in the Actions column will turn grey.
Search for a proactive message
To search for a proactive message, enter the search criterion in the Search field. The respective results will appear on the screen.

Customise display of table
The Customise display helps you select a specific list of columns you want to preview in the table results.
To view customise table results, follow these steps:
- Click the Customise display drop-down on the top-right corner of the results table.

- Choose the required columns from the list by selecting the checkboxes adjacent to each column name.
You can instantly view the results on the screen by checking and unchecking the checkboxes.
Note
By default, Title and Actions columns are preselected and cannot be disabled.
Updated over 2 years ago